

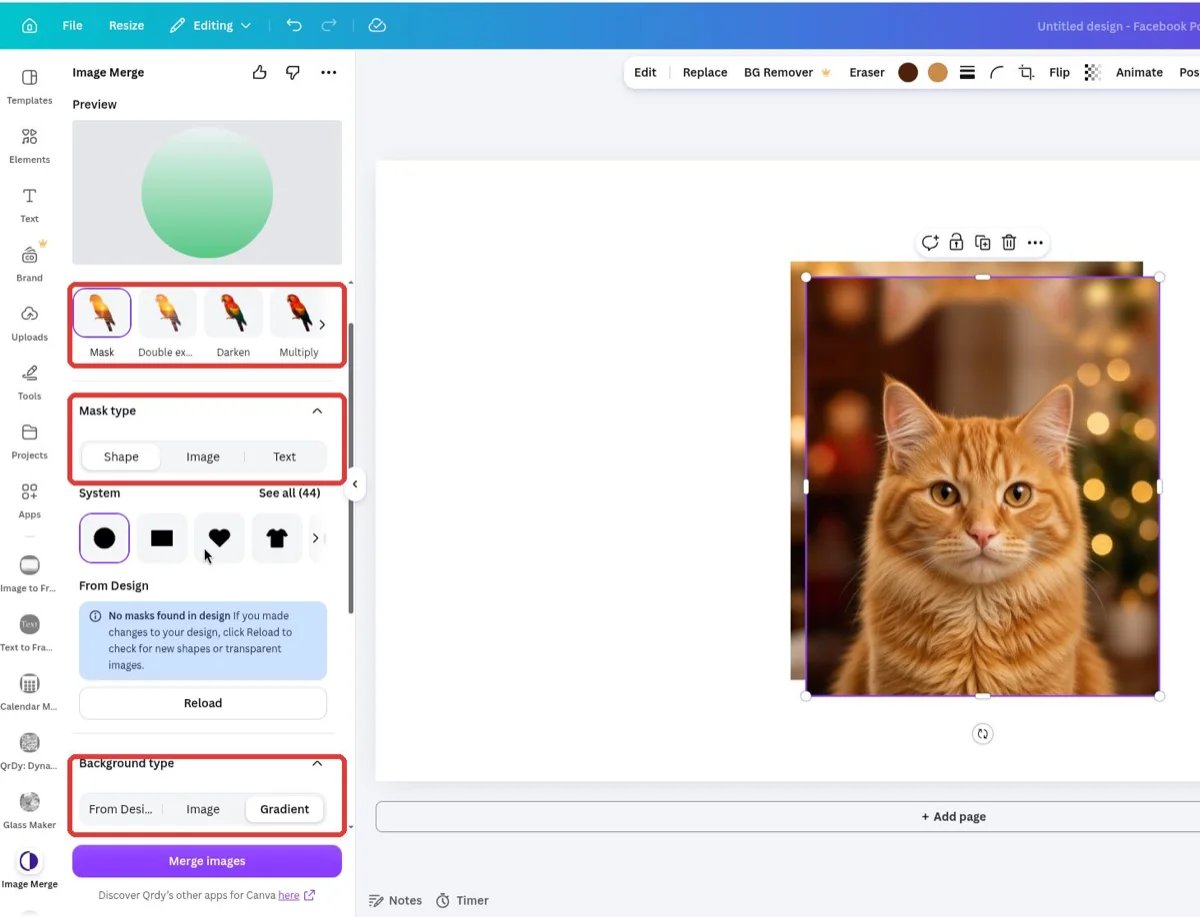
The Image Merge panel: Preview, Effect, Mask type, Background type, and Merge images
The panel at a glance
Open Image Merge from the left sidebar in Canva (or search for it in Apps). The panel is one scrolling column:- Preview — pinned at the top; what you see is exactly what gets merged.
- Effect — a carousel of 17 blend-effect thumbnails.
- Mask type — Shape / Image / Text tabs: the shape that cuts the result.
- Background type — From Design / Image / Gradient tabs: what gets poured in.
- Merge images — the purple button at the bottom, with your plan status line above it.
Part A — Choose a mask
Shape tab: 44 built-in masks
Tap a shape in the System row — the selected shape gets a purple outline and the Preview changes immediately. Use the› arrow to scroll the row.
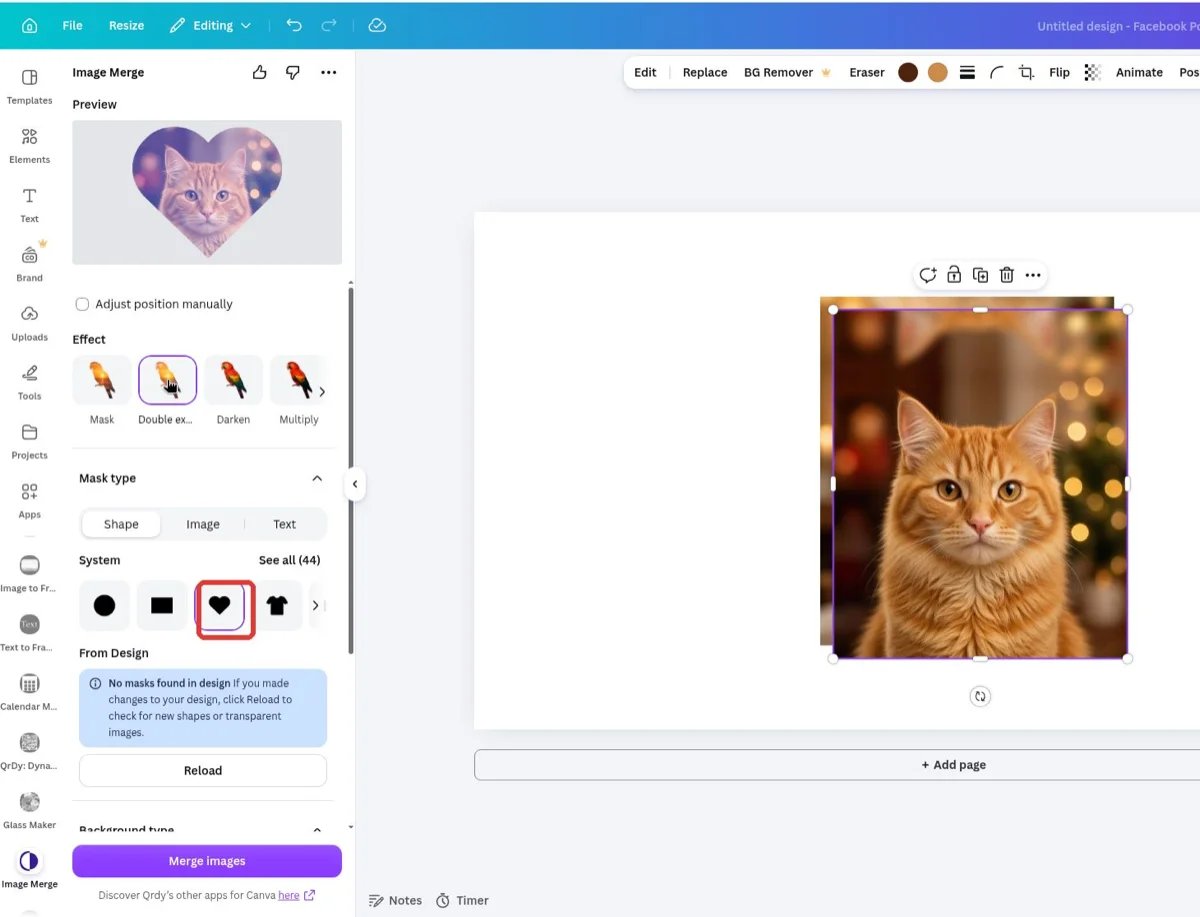
The heart mask selected in the System row — the Preview updates instantly
← to go back.
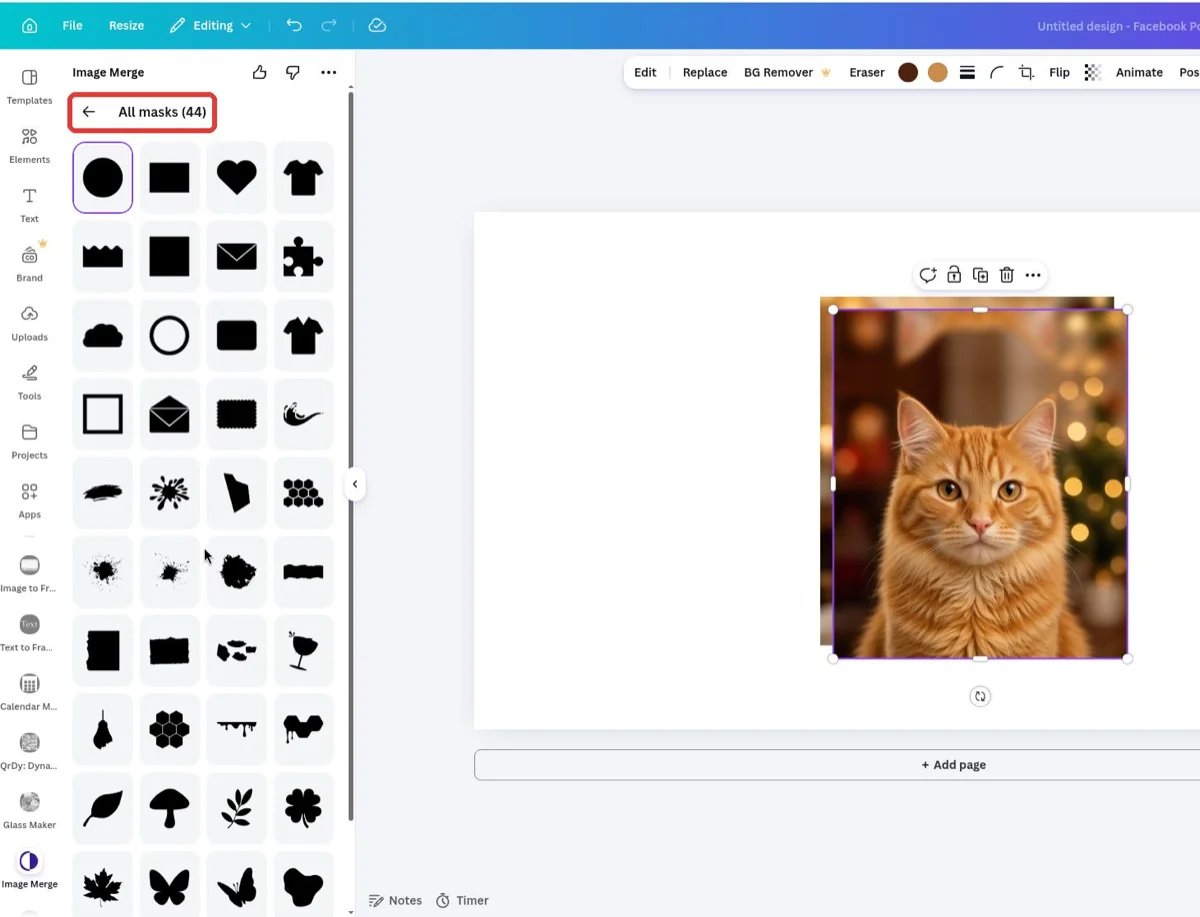
All masks (44): the full grid with artistic shapes further down
From Design: shapes on your page
Right below System sits From Design. If the page has no shapes yet, the app shows “No masks found in design” — add a vector shape (Elements → Shapes), press Reload, and the shape appears as a selectable mask. A rotated shape keeps its rotation as a mask.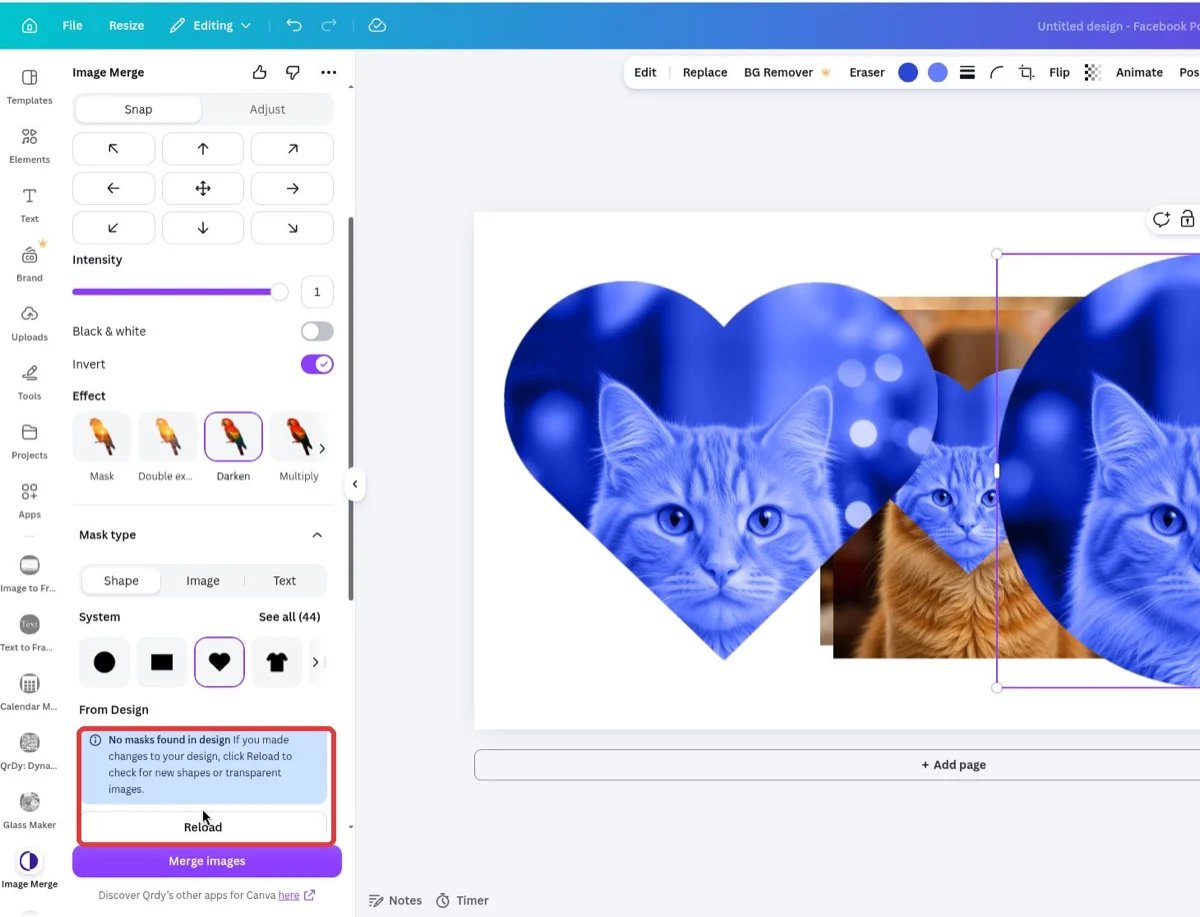
From Design with the Reload button — scan shapes you've added to the page
Image tab: a picture as the mask (Pro)
Select an image on your page and press Use selected image — the app recommends “use an image with a clear shape and transparent background” (a logo, a cutout subject). The chosen image shows as a thumbnail; Remove selection clears it.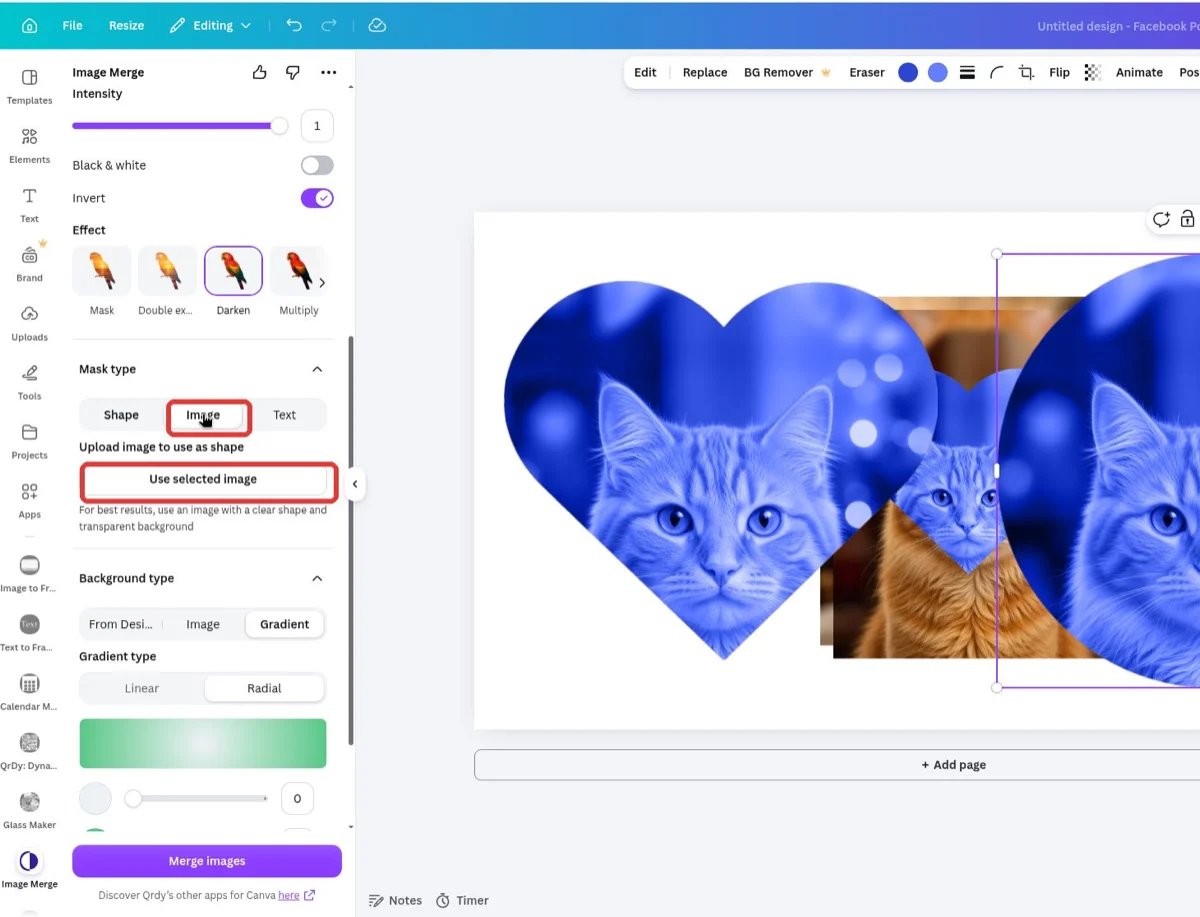
Image tab: Use selected image with the transparent-background recommendation
Text tab: type a mask (Pro)
Type into Enter text to use as shape (sample text: YOUR TEXT), toggle B (bold) or I (italic), pick a Font (Roboto, Open Sans, Montserrat, Inter, Roboto Condensed, Roboto Mono…), and set Letter spacing.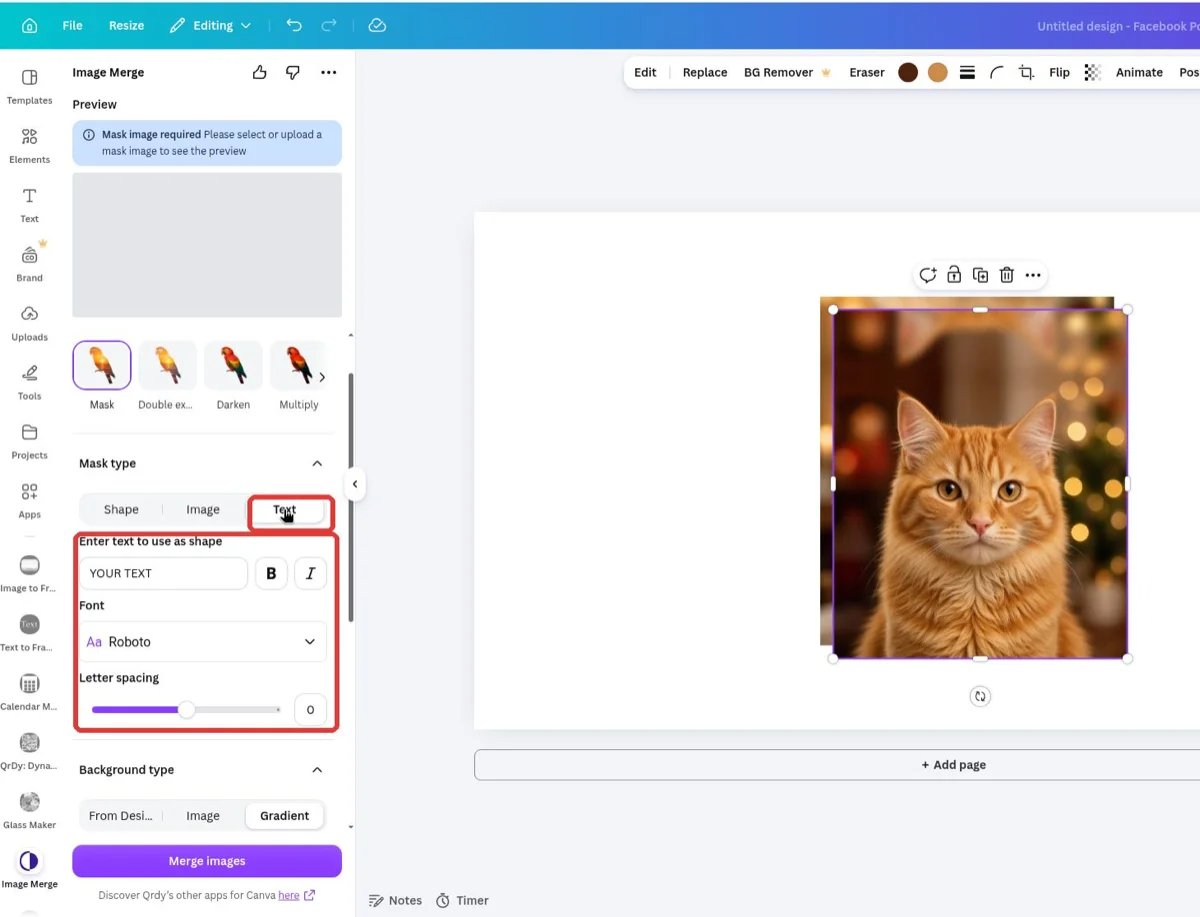
The Text tab: text box, B / I buttons, Font, and Letter spacing
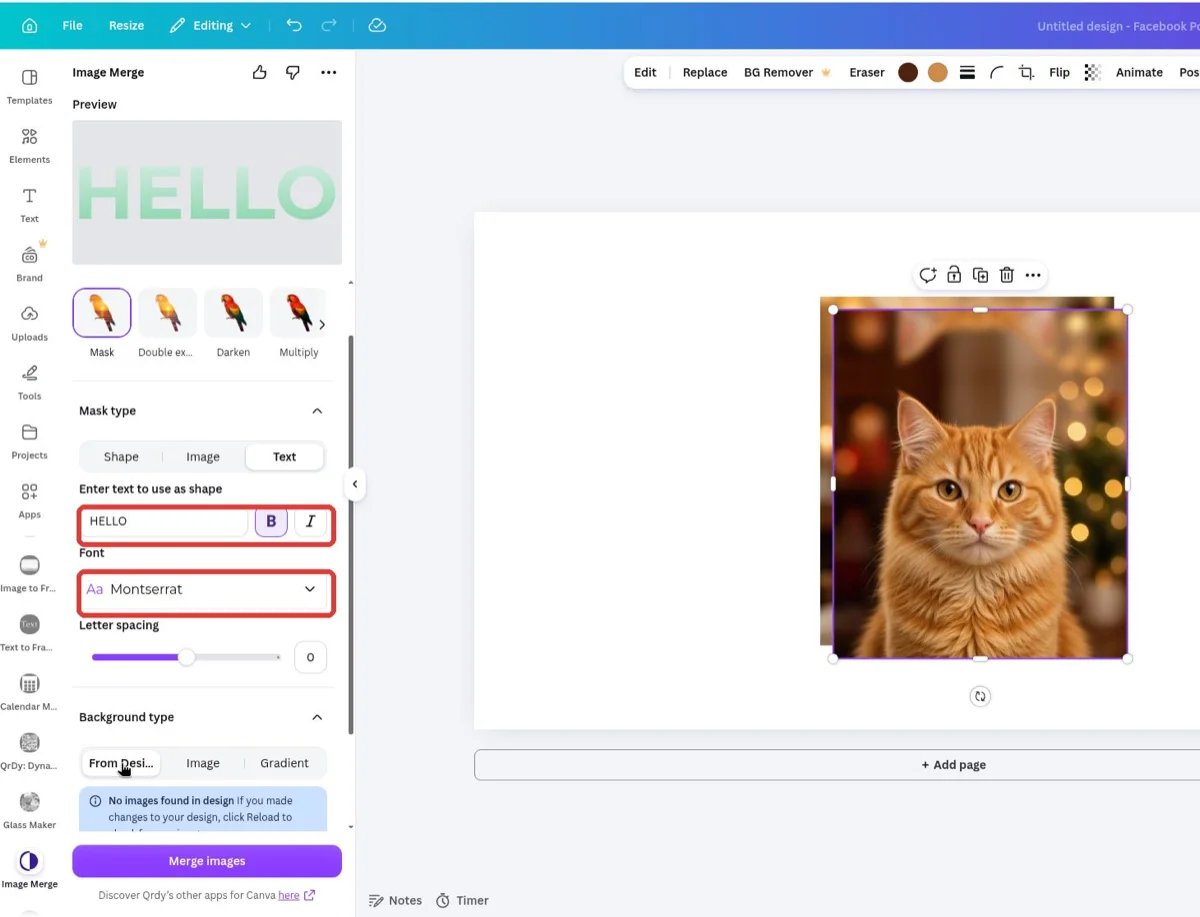
HELLO in Montserrat Bold as the mask
Part B — Choose a background
From Design: an image on your page
The From Design tab lists every image on the current page — tap one to pour it into the mask. Added a new photo? Press Reload.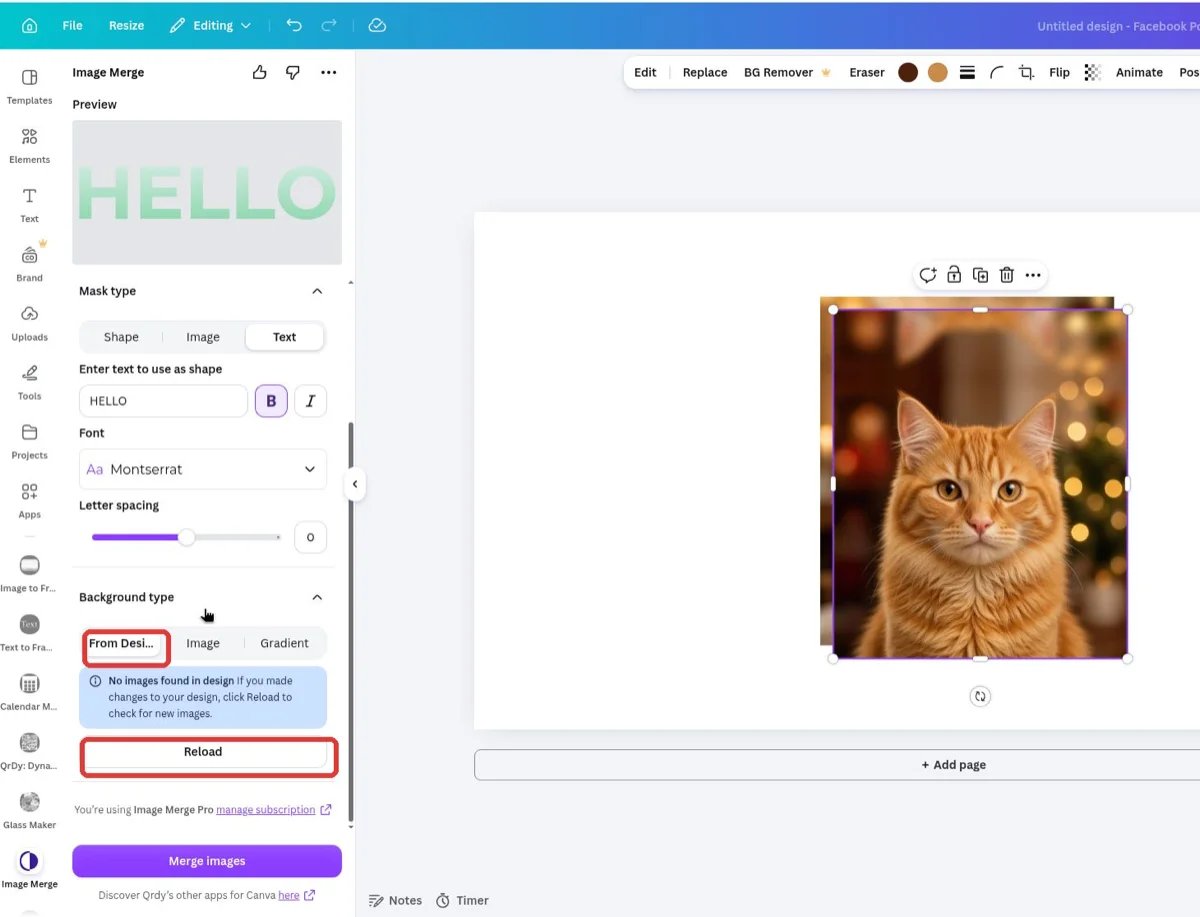
Background type → From Design, with Reload to rescan the page
Image: selected image or the flattened page
Press Use selected image after clicking a photo on the page — or press Export design to flatten the entire page (text, stickers, graphics and all) into one image and use that as the background.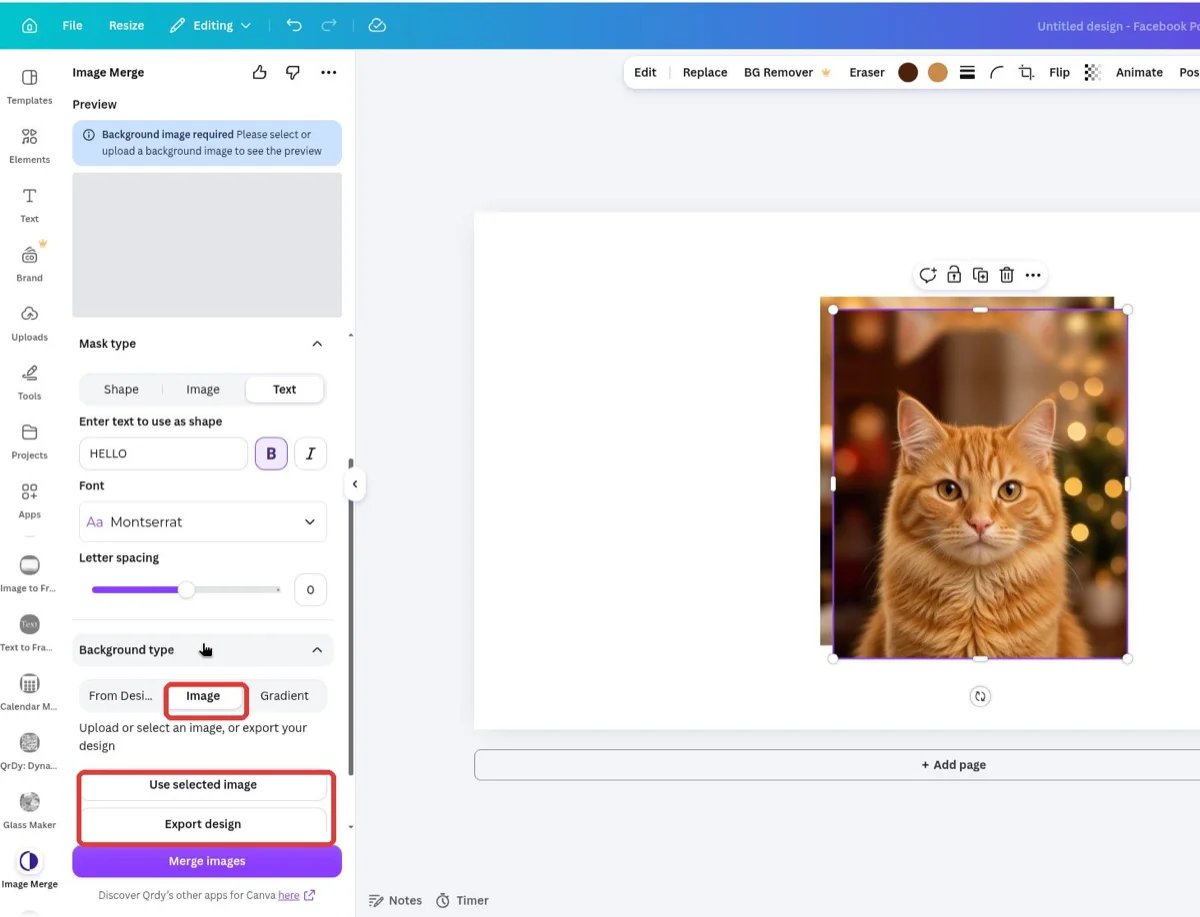
Background type → Image: Use selected image or Export design
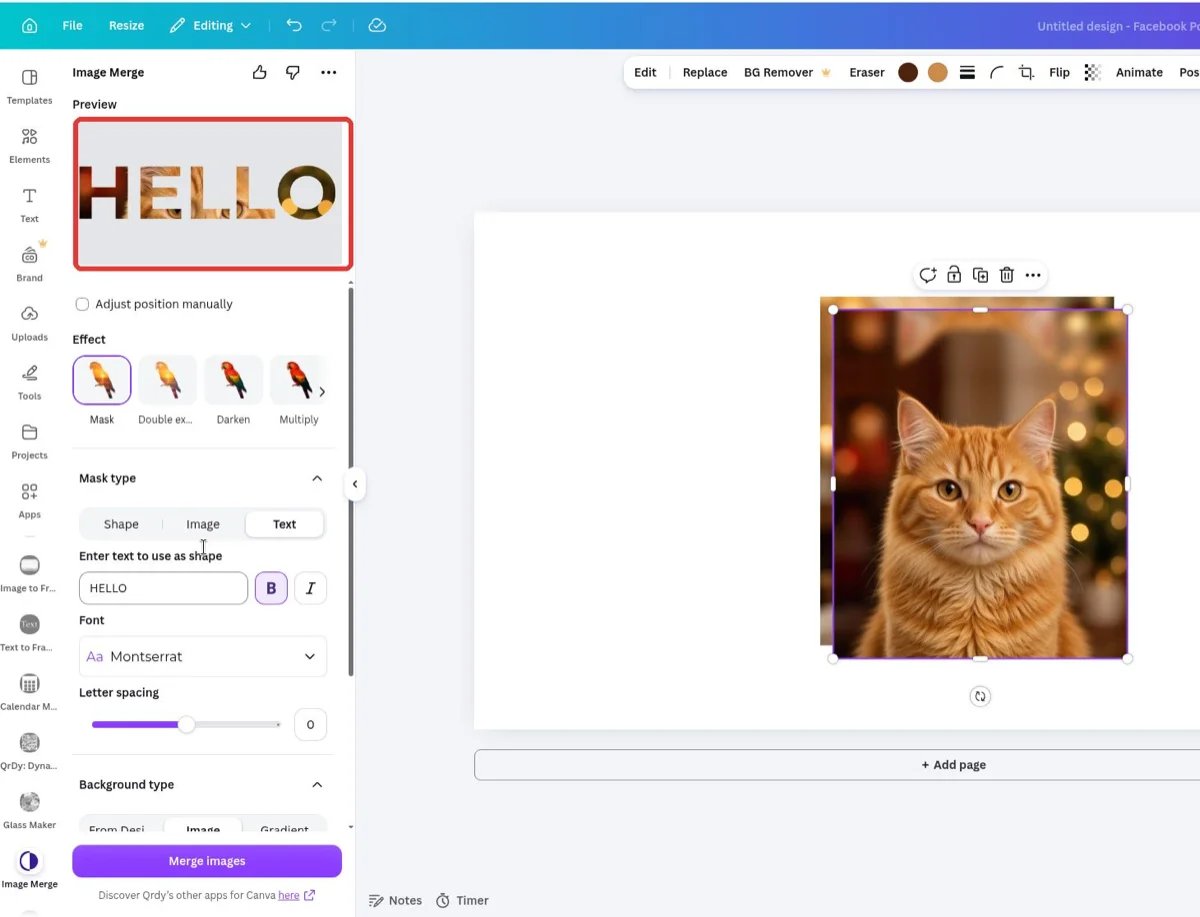
The HELLO text mask filled with the selected photo
Gradient: Linear or Radial
Build a gradient instead of using a photo. Linear has an Angle slider (0–360); Radial radiates from the center and has no angle. Each color stop has a swatch and a position (0–100); + Add color adds more stops.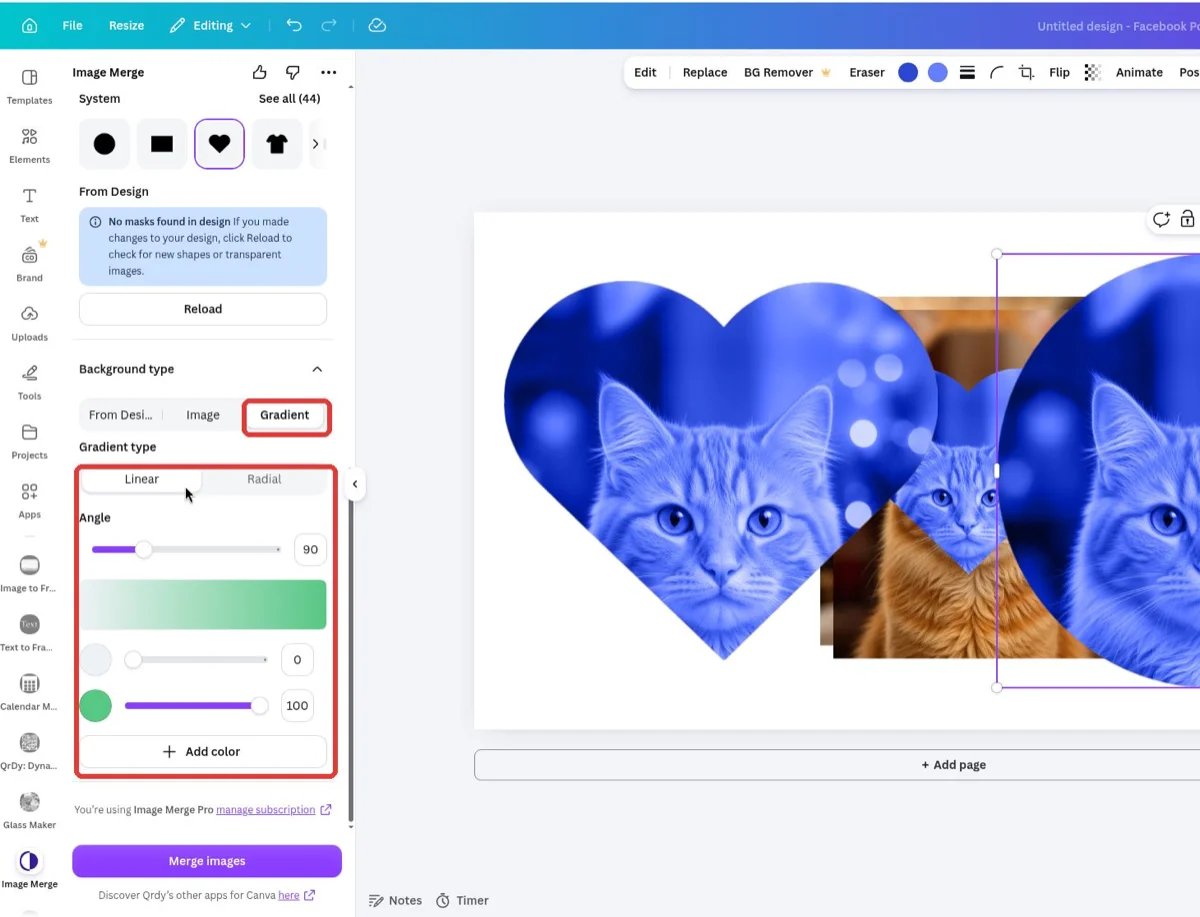
A Linear gradient at 90° with two color stops
Part C — Pick one of the 17 effects
Scroll the Effect carousel with the‹ › arrows. Every effect has a parrot thumbnail so you can compare them at a glance: Mask, Double exposure, Darken, Multiply, Color burn, Lighten, Screen, Color dodge, Overlay, Soft light, Hard light, Difference, Exclusion, Hue, Saturation, Color, Luminosity.
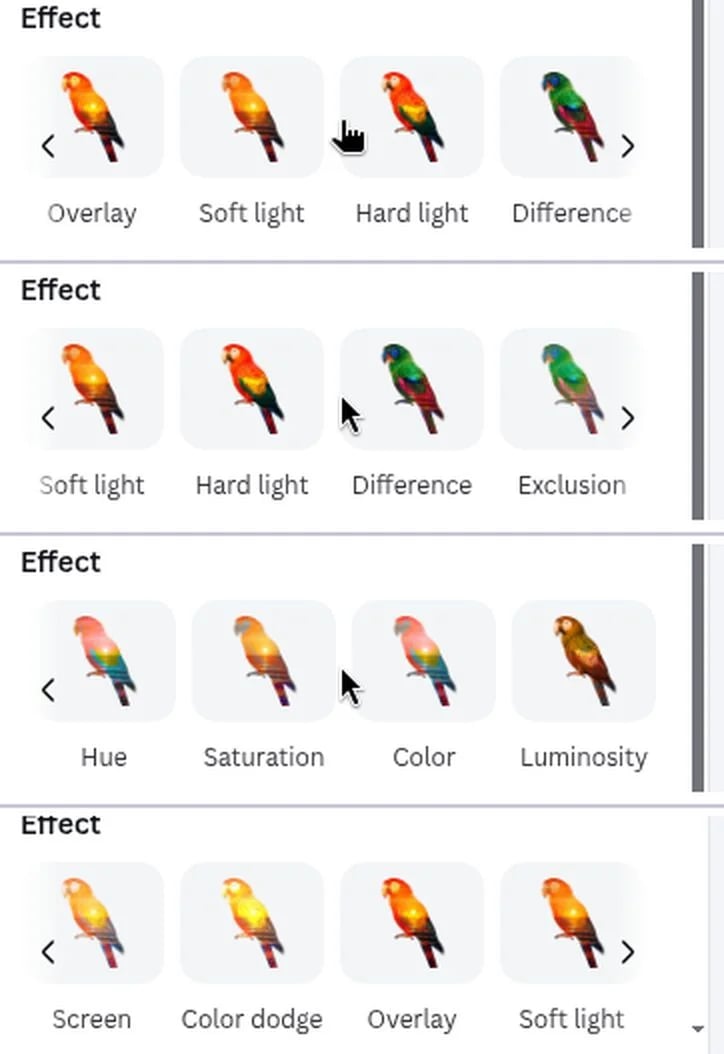
Scrolling the 17 effect thumbnails
- Mask is the clean cut — the background simply fills the shape.
- Double exposure is the classic portrait-meets-landscape blend with a soft, vintage light.
- The rest mirror Photoshop blend modes for darkening (Darken, Multiply, Color burn), lightening (Lighten, Screen, Color dodge), contrast (Overlay, Soft light, Hard light), comparison (Difference, Exclusion), and color mixing (Hue, Saturation, Color, Luminosity).
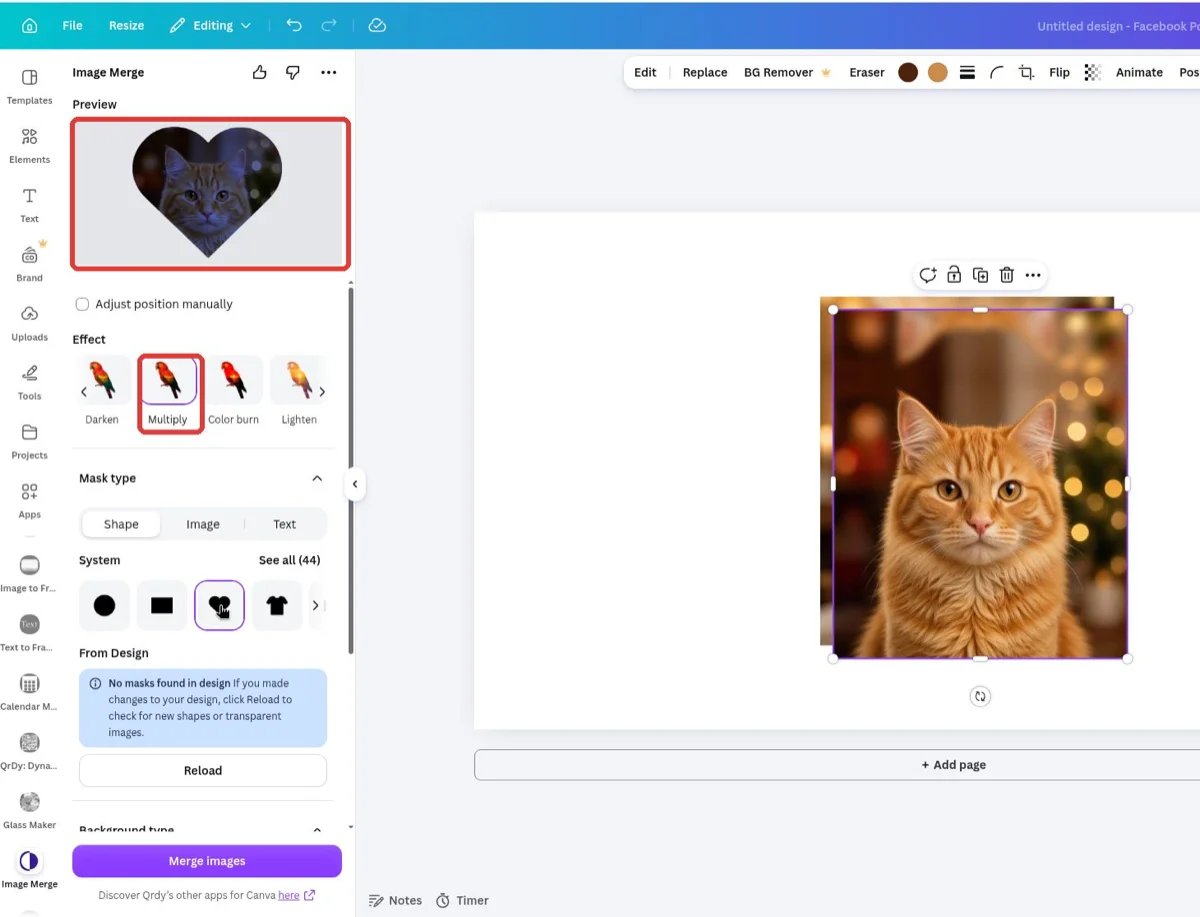
Multiply: the image inside the heart darkens
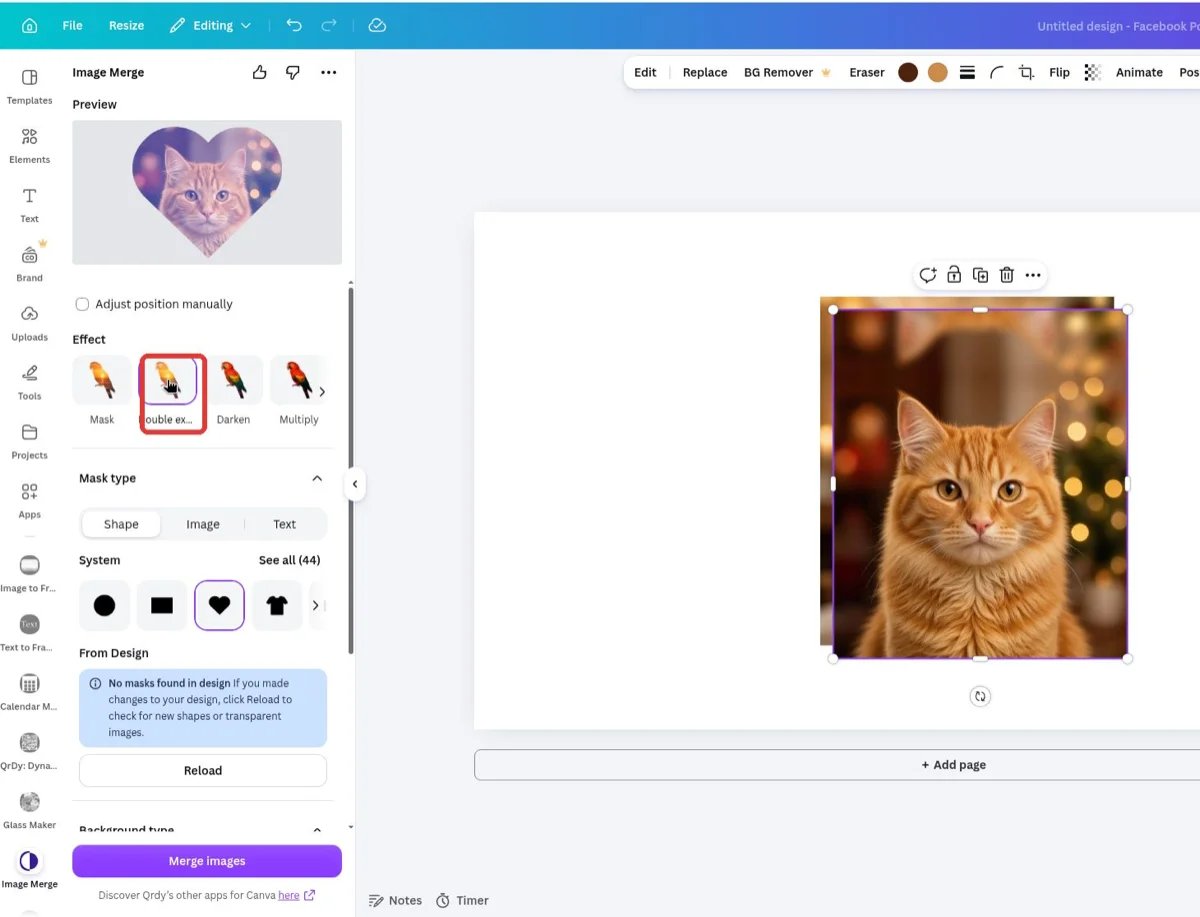
Double exposure: a soft, bright overlay blend
Adjustment controls
The controls under the carousel change with the selected effect: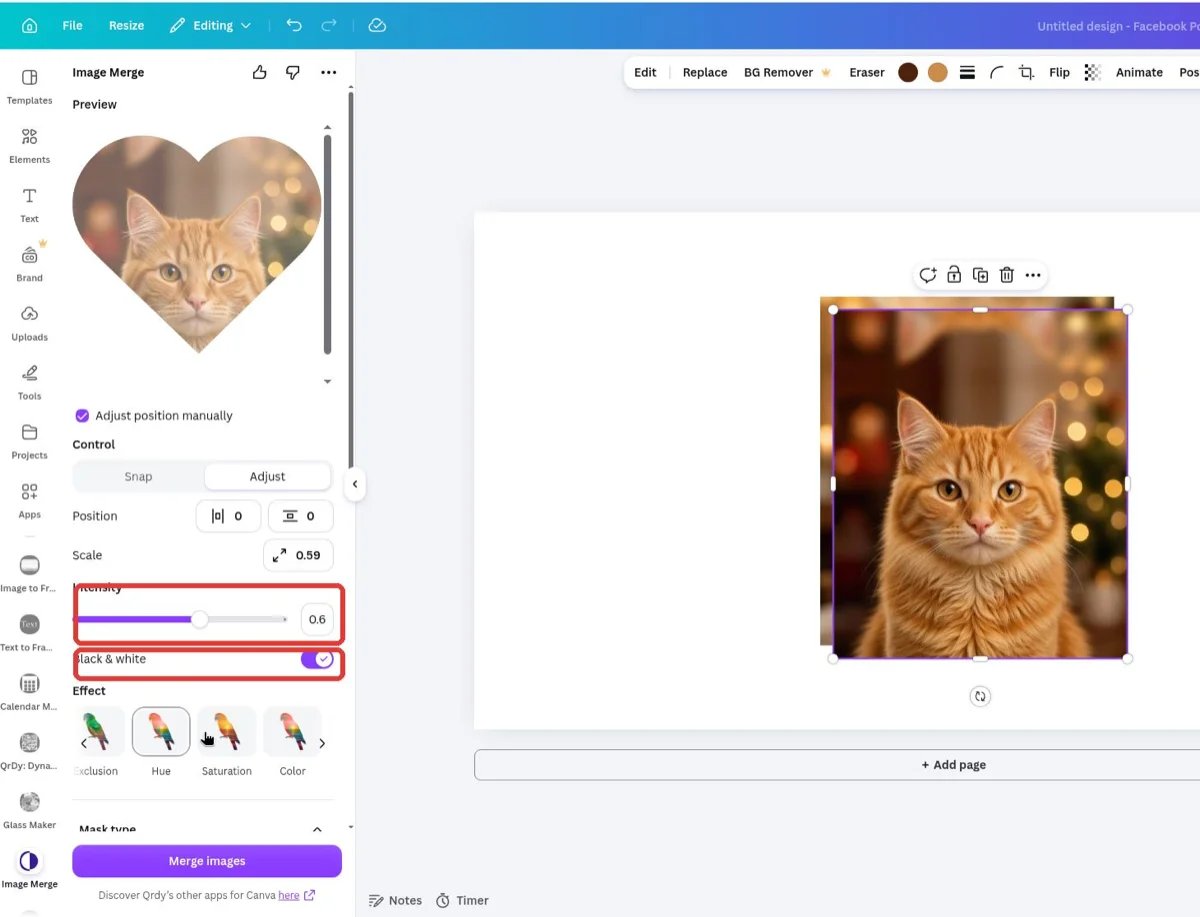
Intensity and the Black & white toggle
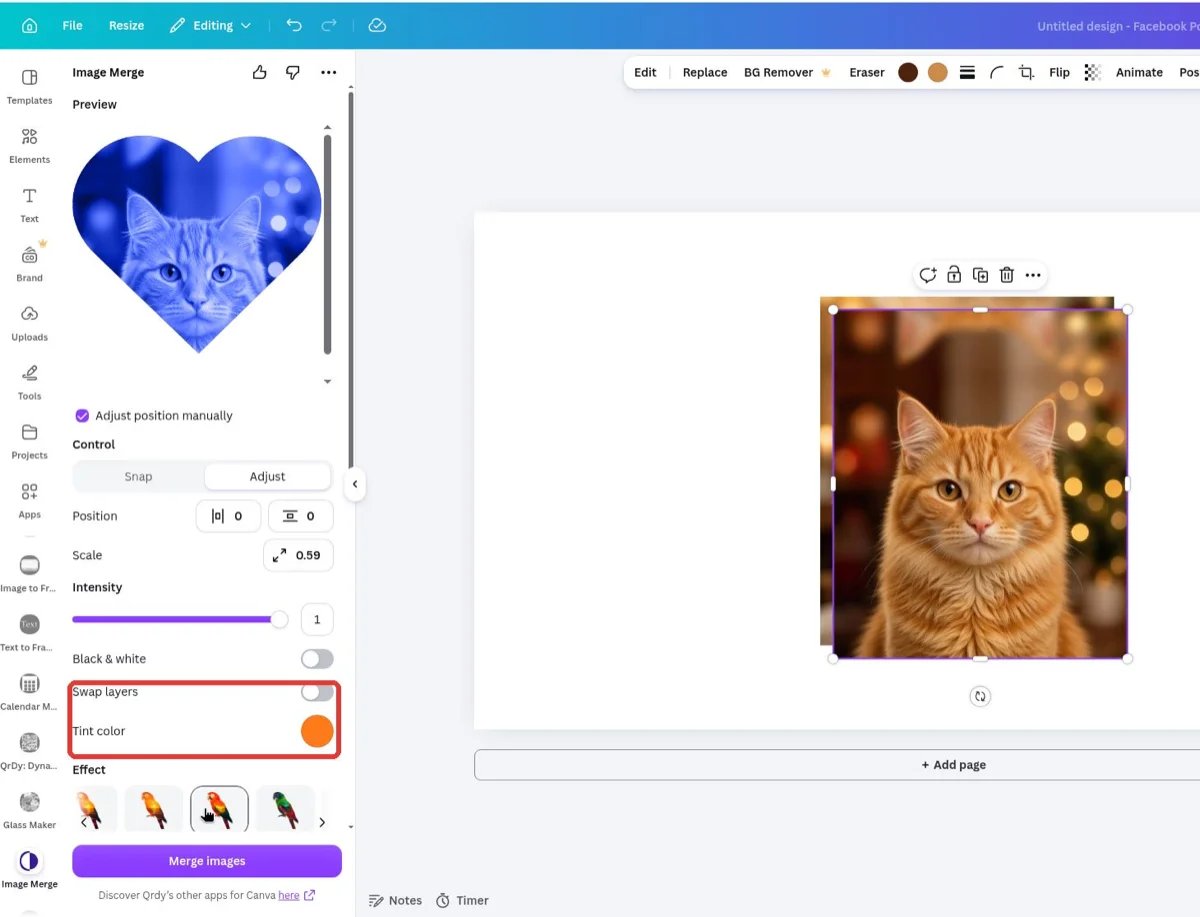
Swap layers and Tint color — here an orange tint for a duotone look
Part D — Position the background inside the shape
Tick Adjust position manually under the Preview to open the Control section:- Snap tab — nine arrow buttons to push the background to a corner, an edge, or the center of the mask.
- Adjust tab — type exact Position X/Y offsets and a Scale value (for example 0.59) to zoom the background in or out inside the shape.
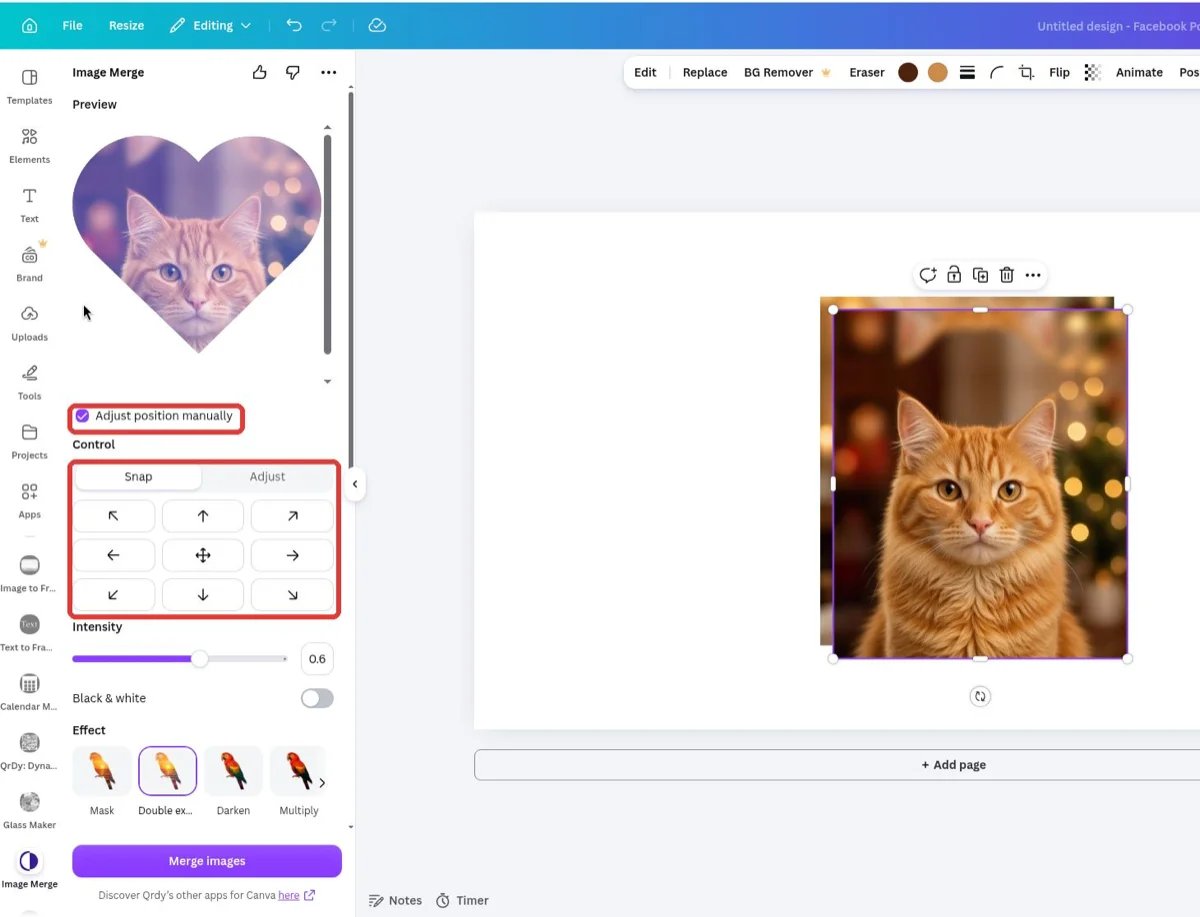
Snap: nine quick-align buttons
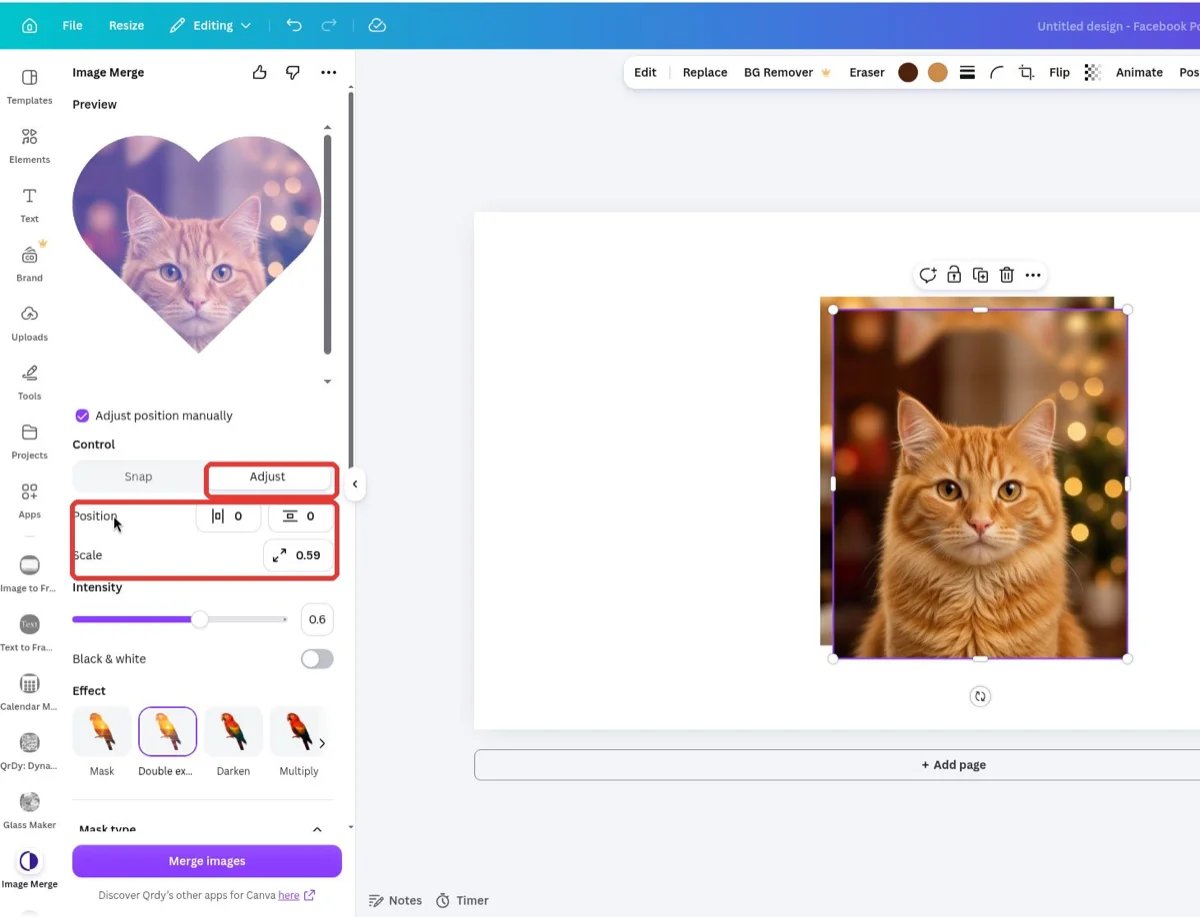
Adjust: exact Position X/Y and Scale
Part E — Merge
Press Merge images. The merged result — a transparent PNG cut exactly to the mask — is added to your page and selected, ready to move, resize, and layer like any image.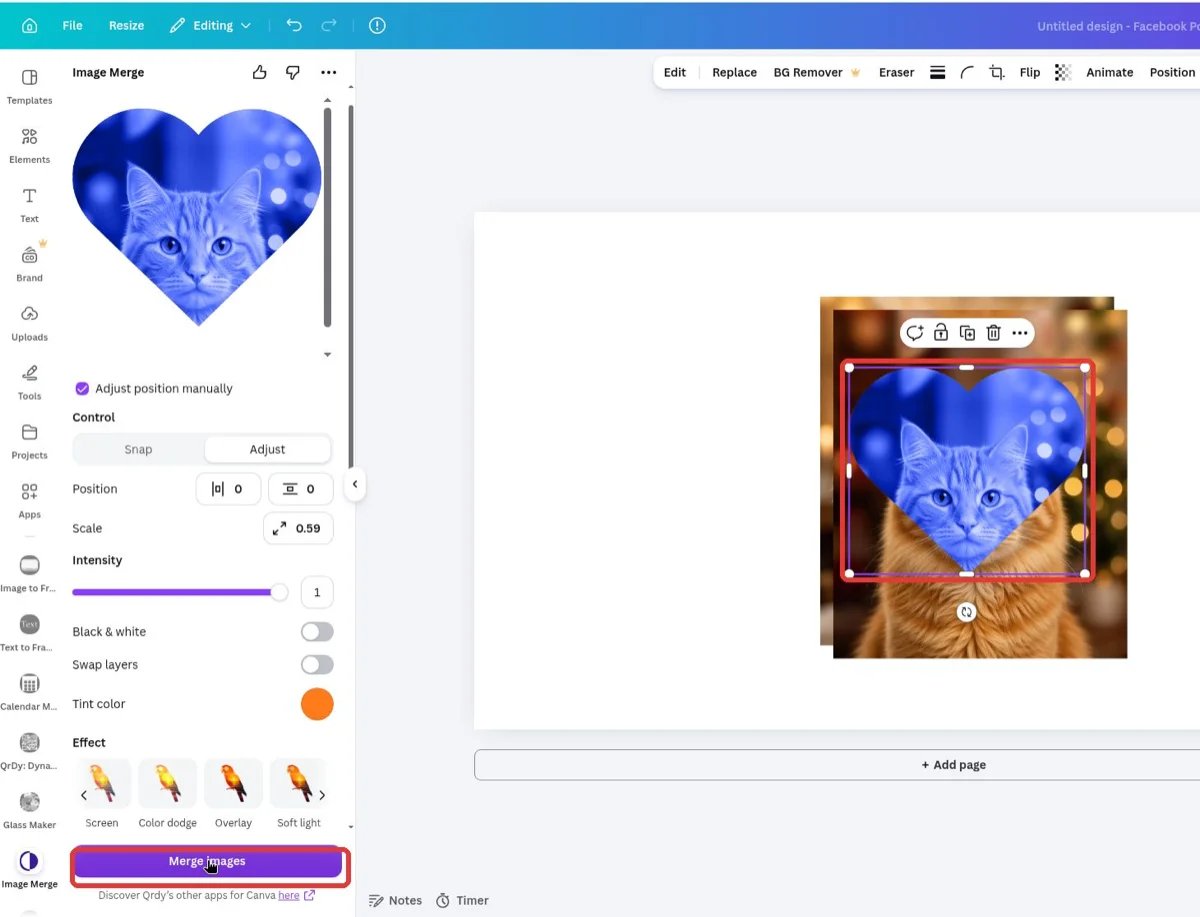
The merged heart lands on the page, cut to shape with a transparent background
Part F — Bulk merge (Pro)
Combine several masks with the same background in one click:Select multiple masks
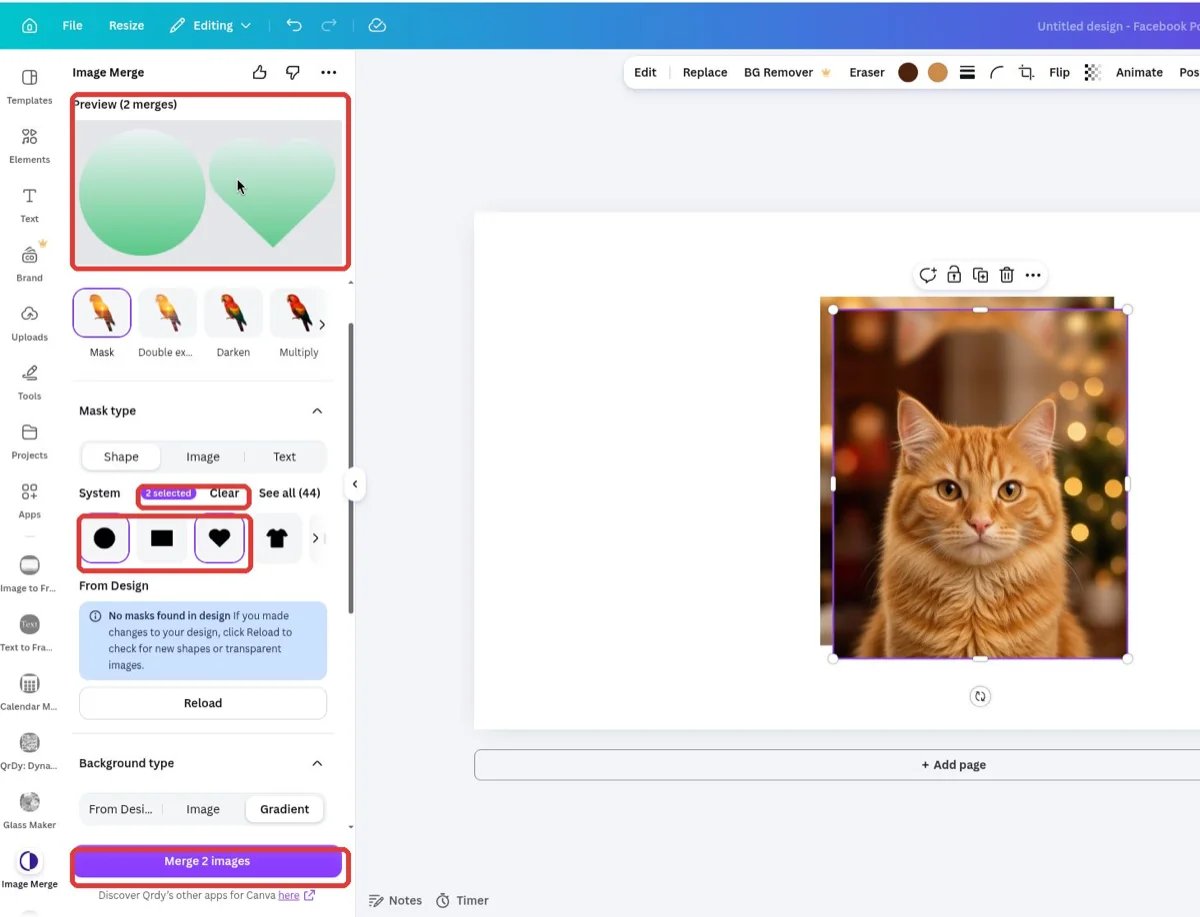
Two masks selected: the badge, Clear button, grid preview, and Merge 2 images
Keep tuning as usual
Press Merge n images
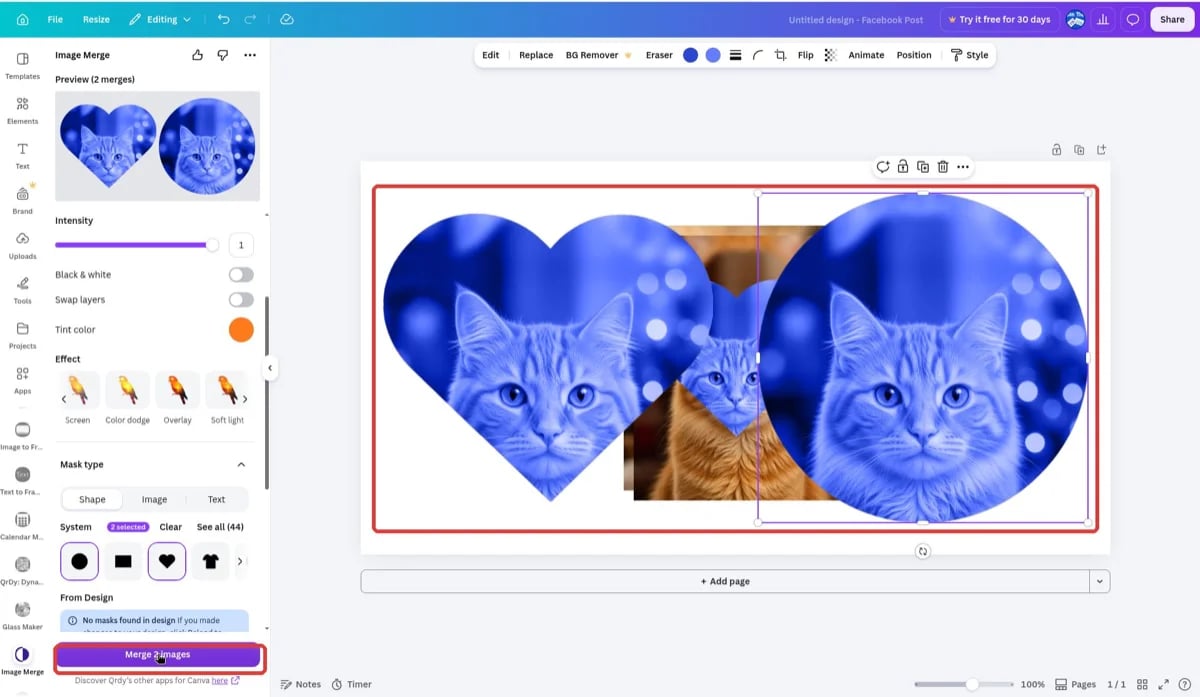
Bulk result: the heart and circle merges placed on the page together
Back to single mode
Free vs Image Merge Pro
Tips & notes
- The result is a baked PNG, not a live effect — to change it, adjust the settings (they’re kept after each merge) and merge again.
- Preview = result. The pinned preview matches the exported image exactly.
- Blend effects pop with color-image masks; silhouette masks mostly change in tone between effects.
- Export design is the move when your background should be a whole composed page — text, stickers, graphics included.
- Ideas: double exposure portraits (portrait mask + landscape background), product photos in hearts/circles/t-shirts, photo-filled words as hero titles, bulk mood boards and sticker sheets from one background.
Frequently asked questions
Is the merged image editable afterwards?
Is the merged image editable afterwards?
Why doesn't my design's shape show up under From Design?
Why doesn't my design's shape show up under From Design?
What's the difference between Image Merge and a Canva frame?
What's the difference between Image Merge and a Canva frame?
Which features need Image Merge Pro?
Which features need Image Merge Pro?