Get started with Image to Frames in just a few minutes. This guide will walk you through installing the app in Canva and creating your first frame.
Prerequisites
A Canva account
Image to Frames app installed in Canva
Image to Frames Pro subscription (required - free users cannot use the app)
Image to Frames requires a Pro subscription. Free users cannot access any features. Students and teachers can get a free 1-year Pro subscription.
Install Image to Frames in Canva
Open Canva
Log in to your Canva account and open any design or create a new one.
Open Apps panel
Click on “Apps” in the left sidebar of Canva.
Search for Image to Frames
Type “Image to Frames” in the search bar and select the app from the results.
Add the app
Click “Add” or “Use” to install Image to Frames in your Canva workspace.
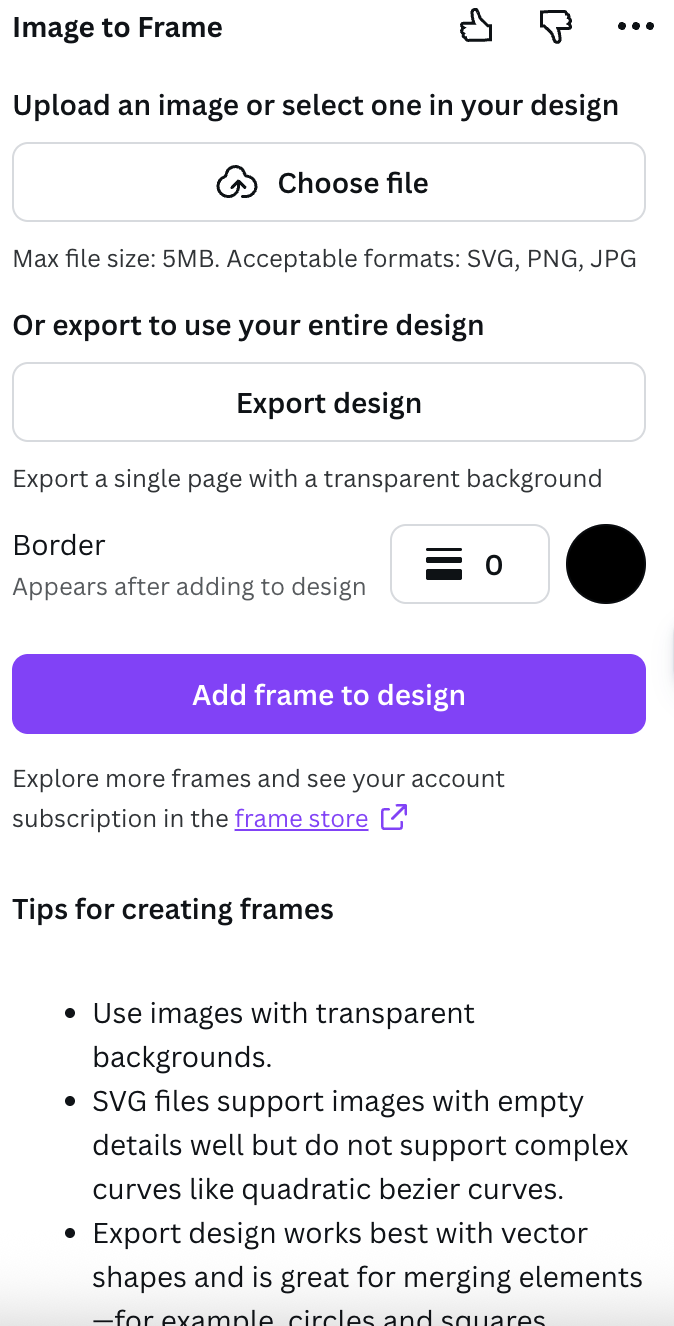
Opening Image to Frames Once you’ve installed the app, here’s what you’ll see when you open Image to Frames:
Three ways to create frames Image to Frames offers three methods to create frames. Choose the one that works best for your workflow:
Method 1: Use image from Canva design (Recommended)
Select an image
Click on any image in your Canva design that you want to convert into a frame.
Open Image to Frames
Open the Image to Frames app from your Apps panel.
Convert
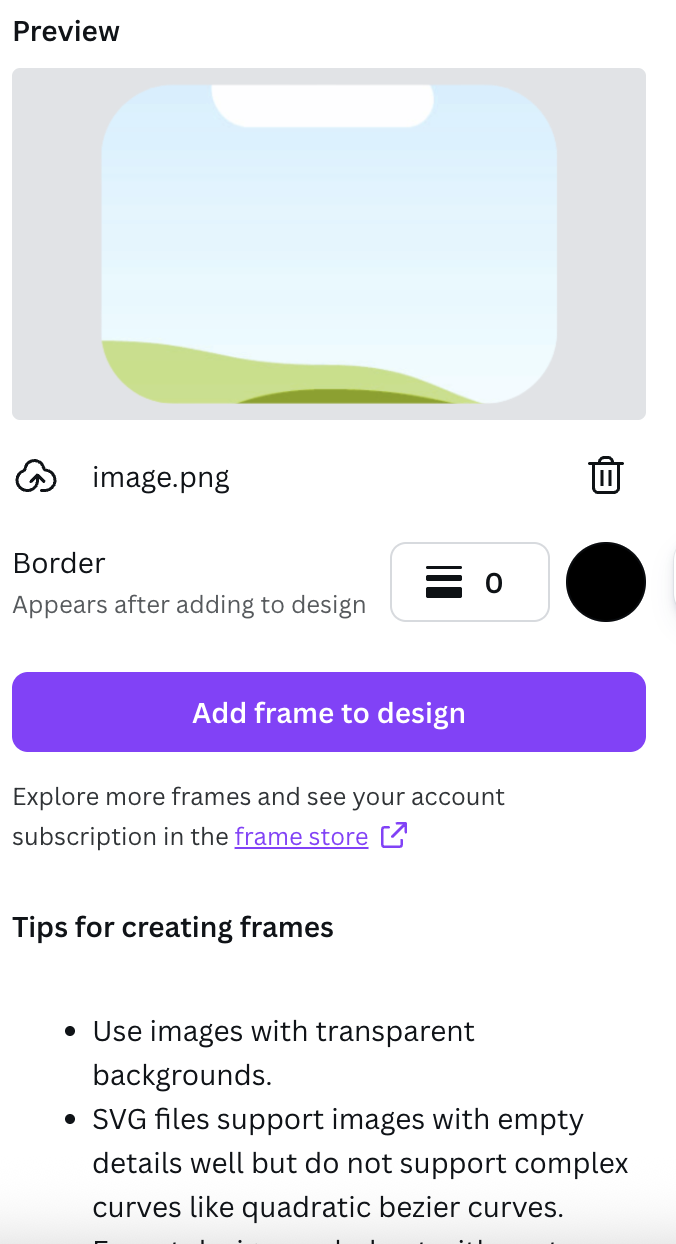
Click the convert button. Your image is instantly transformed into a frame! This is the fastest method because you don’t need to upload anything.
Method 2: Upload image or SVG file
Open Image to Frames
Open the Image to Frames app from your Apps panel in Canva.
Upload file
Click “Upload” and select an image (PNG, JPG) or SVG file from your device.
Convert
Click convert. Your uploaded file is instantly transformed into a frame. This method is perfect for importing SVG files and converting them to frames.
Method 3: Import from Frame Store
Browse Frame Store
Visit the Frame Store and browse our collection of 40,000+ premium frames and growing.
Search frames
Use the search bar to find frames by tags like animal, map, heart, cute, or man.
Download frame
Click download to save the SVG frame file to your device.
Import into Canva
Open Image to Frames app in Canva and import the downloaded SVG file. You must import the frame into the Image to Frames app in Canva. Simply downloading the SVG won’t work - it needs to be imported into the app to display correctly.
Using your frames Once you’ve created a frame:
Frame is ready
Your converted frame appears in your Canva design automatically.
Add images
Drag any image into the frame to crop it to the frame’s shape.
Adjust
Resize, reposition, or style your frame and image as needed.
Video tutorial Watch our complete tutorial to see Image to Frames in action:
This comprehensive tutorial covers all features and functions of Image to Frames, including:
Installing the app in Canva
All three methods to create frames
Using the Frame Library
Tips and best practices
Next steps
Using Frame Library Learn how to browse, search, and download frames from our premium library.
Use Cases Discover creative ways to use Image to Frames in your projects.
Pro Features Learn about all Pro features and benefits.
FAQ Find answers to common questions.