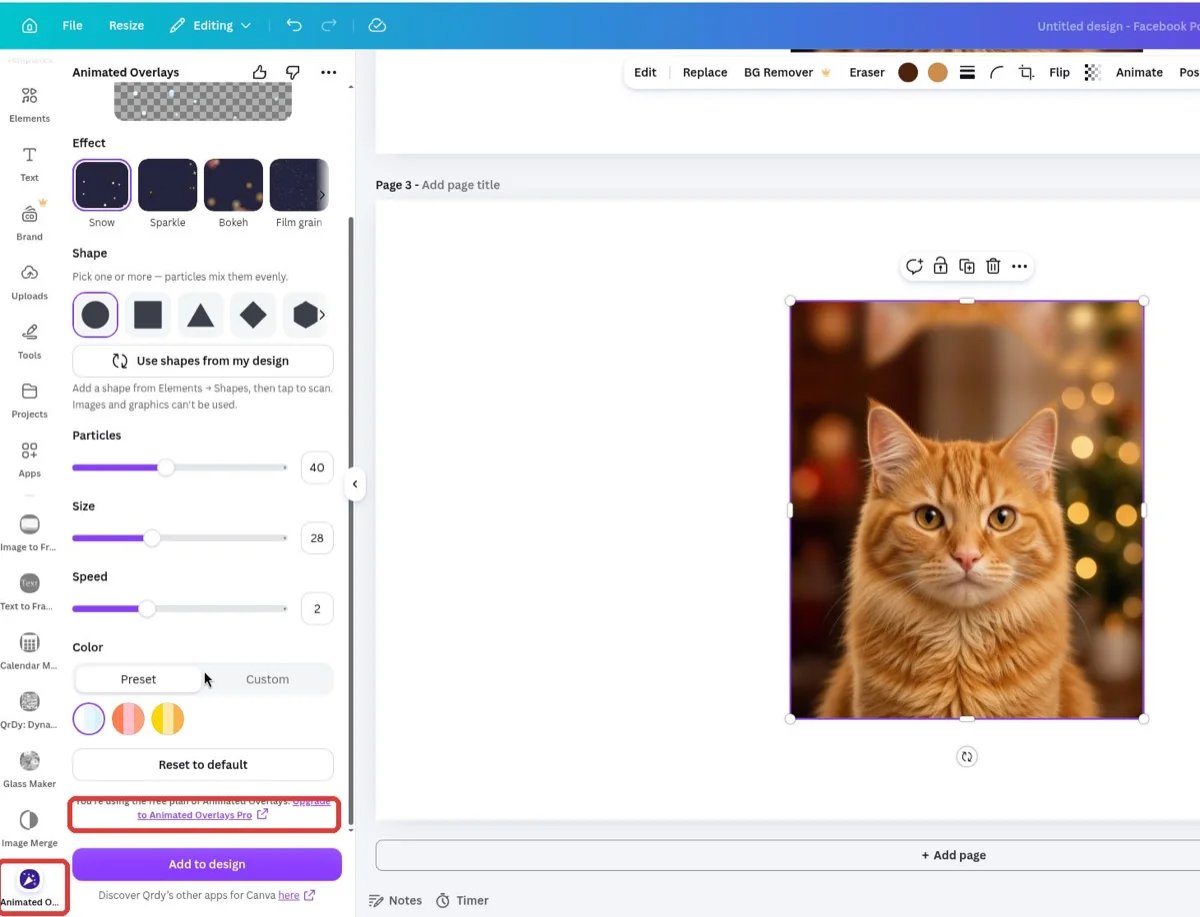
This is the complete, step-by-step guide to Animated Overlays — from opening the panel to tuning every effect, shape, slider, and color, and getting the animated sticker into your Canva design.
Animated Overlays panel opened in Canva with the Snow effect selected

The Animated Overlays panel in Canva: Preview, Effect, Shape, sliders, Color, and Add to design

Part A — Open the app

1

Open Animated Overlays from the left sidebar

Open the design you want to animate. In the left sidebar of the Canva editor, click the Animated Overlays icon (or find it under Apps). The panel opens with the Snow effect pre-selected.From top to bottom you’ll see: Preview, the Effect carousel, Shape, three sliders, Color, Reset to default, your plan status line, and the purple Add to design button pinned at the bottom.
2

Read the preview — the checkerboard is transparency
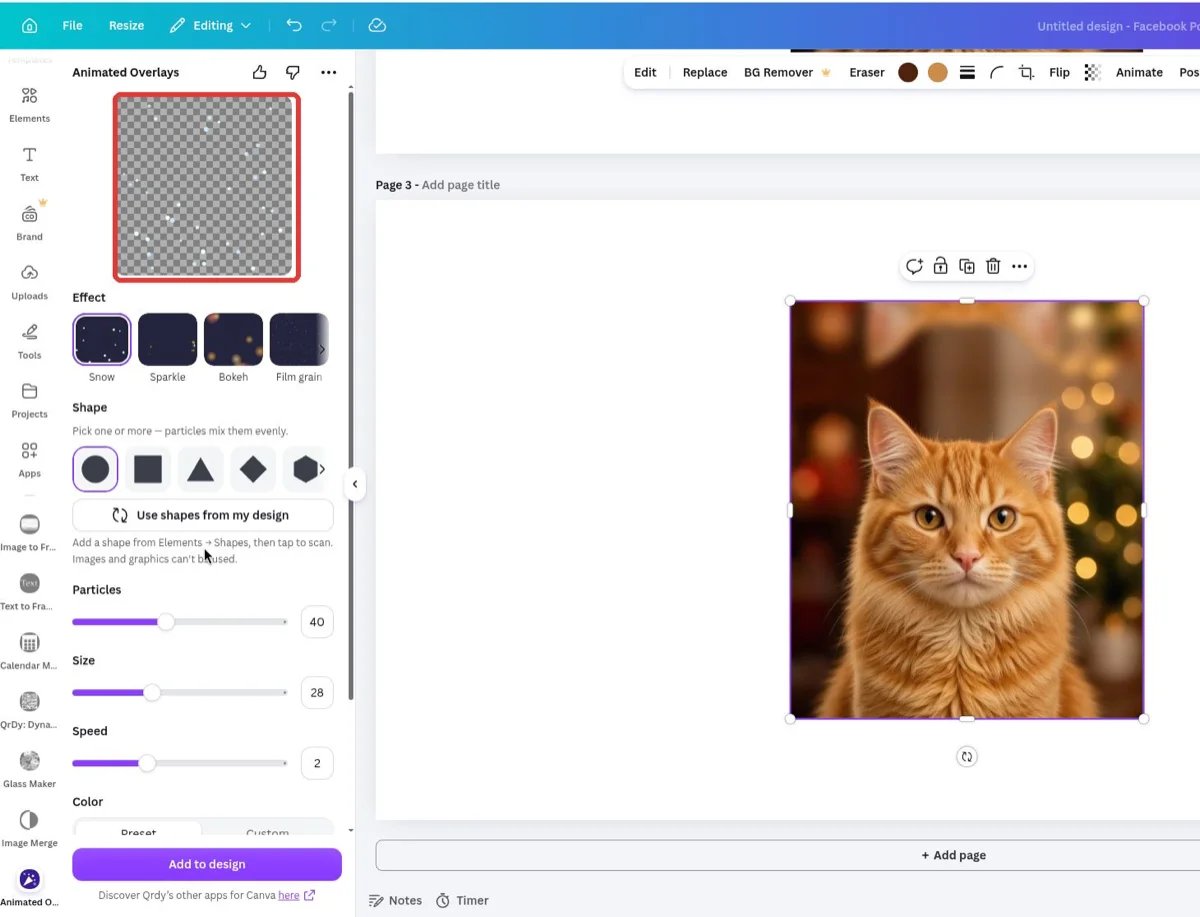
The Preview box at the top plays the sticker on a loop. Anywhere you see the checkerboard pattern is fully transparent — your design will show through there. Every change you make below updates the preview instantly.
Snow effect preview on a transparent checkerboard background

The checkerboard preview: everything except the particles is transparent

Part B — Choose an effect

1

Browse the Effect carousel to see all 16 effects

The Effect row shows 4 animated cards at a time. Click the › arrow at the right edge to move to the next group, ‹ to go back:Snow, Sparkle, Bokeh, Film grain → Rain, Embers, Stars, Hearts → Bubbles, Balloons, Leaves, Blossom → Confetti, Fireworks, Smoke, Light leakEach card is a live animated GIF preview of the effect.
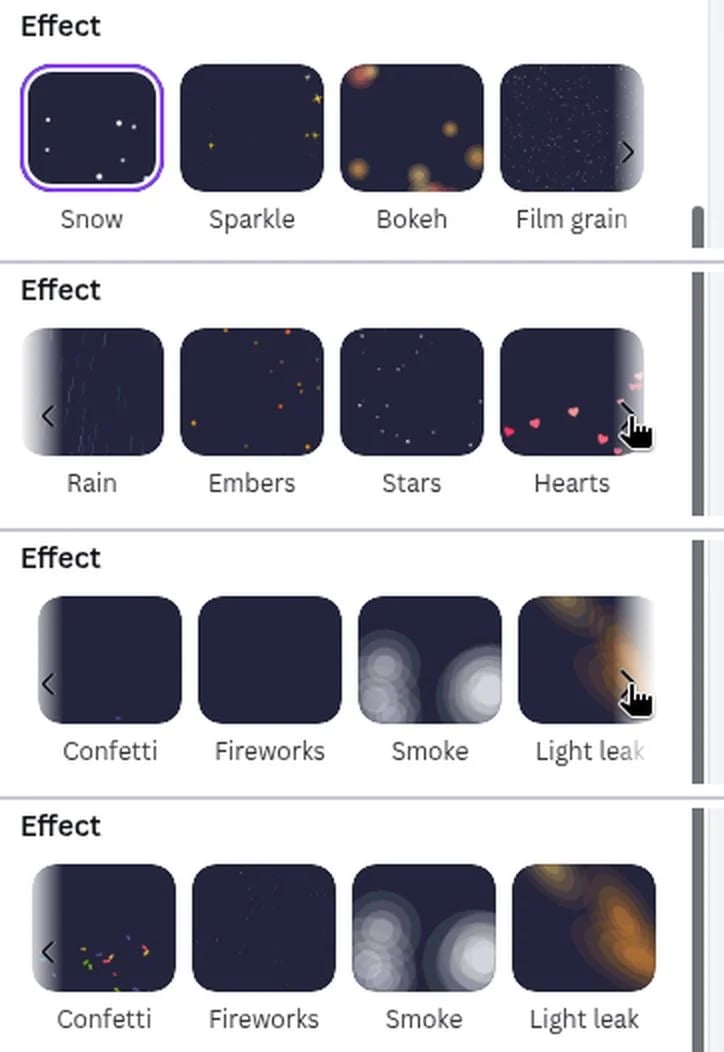
All 16 Animated Overlays effects shown in four carousel groups

The four effect groups as you scroll the carousel

2

Tap an effect — the sliders adapt to it
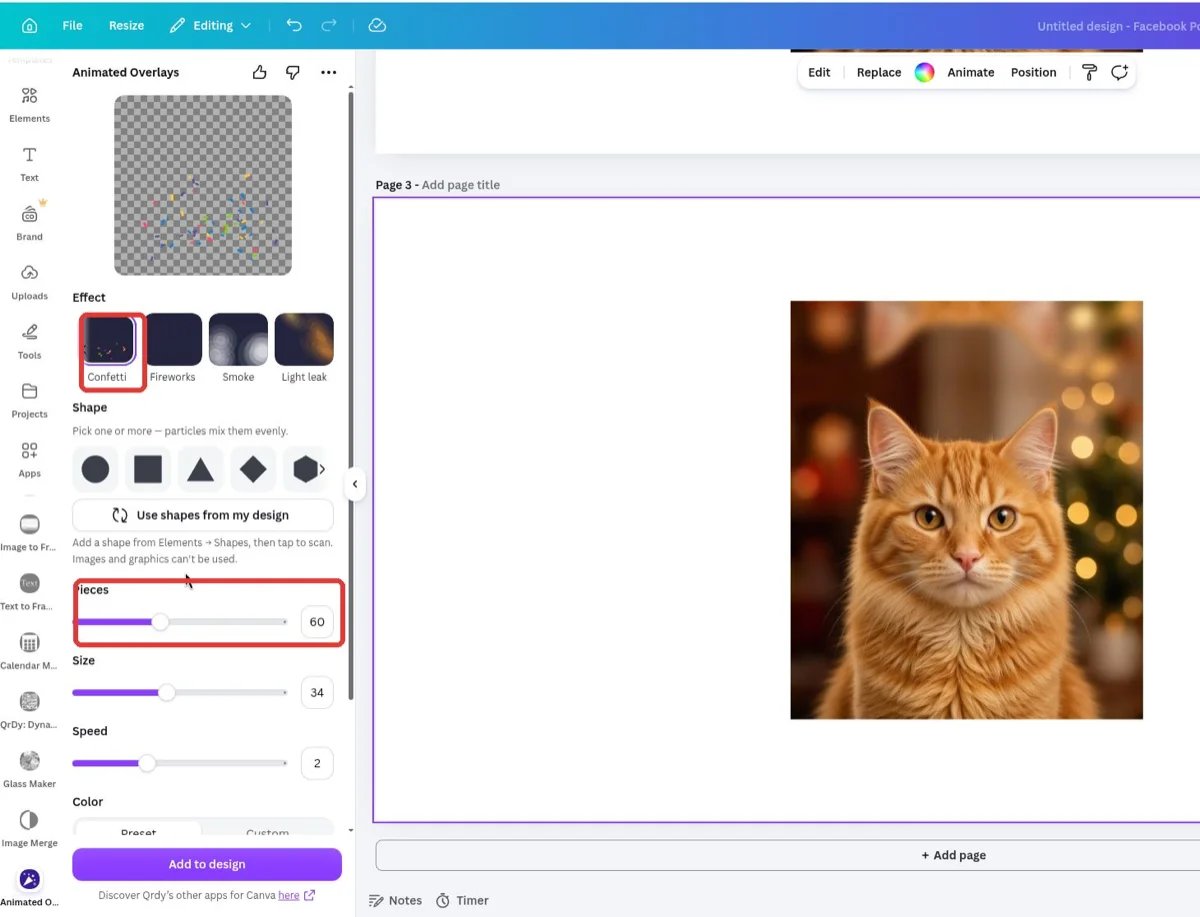
Tap a card to select it. Every effect loads its own default shapes, colors, and slider values, and the slider labels change to match: Confetti uses Pieces, Fireworks uses Sparks, Snow uses Particles, and so on.
Confetti effect selected with the Pieces slider set to 60

Confetti selected: the first slider becomes Pieces (60)

3

Switching effects resets the settings

Selecting another effect replaces all settings with that effect’s defaults — for example Bokeh starts at Particles 20 / Size 160, while Snow starts at Particles 40 / Size 28 / Speed 2. Pick your effect first, then fine-tune.

Part C — Pick the particle shapes

1

Browse the 15 built-in shapes

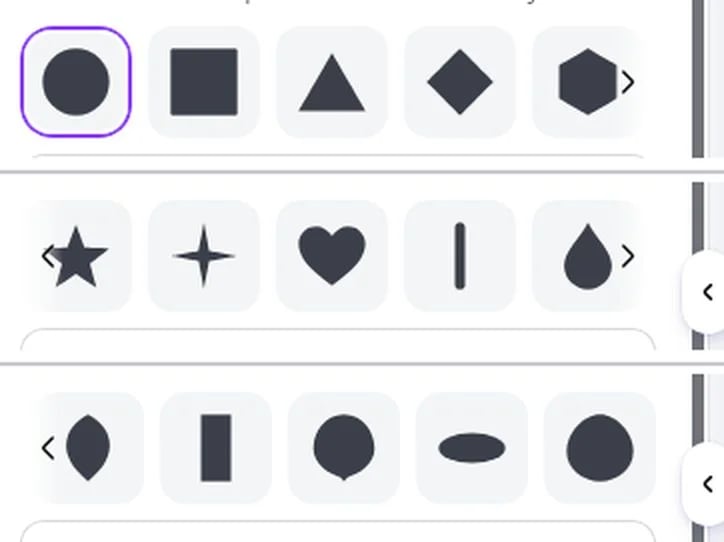
The Shape row (“Pick one or more — particles mix them evenly”) holds 15 particle shapes: circle, square, triangle, diamond, hexagon → star, four-point sparkle, heart, streak, drop → leaf, ribbon, balloon, oval, and petal. Use the › arrow to scroll the row.
The 15 built-in particle shapes in the Shape row

The three groups of built-in particle shapes

2

Toggle shapes on and off

Tap a shape to turn it on (purple outline), tap again to turn it off. With several shapes on, the particles are split evenly between them. The app always keeps at least one shape selected.
3

Scan a shape from your own design

You can use any vector shape on your page as a particle:
  1. Add a shape to the page from Elements → Shapes (a star, an arrow — anything vector).
  2. Click the shape on the page to select it.
  3. Press Use shapes from my design. The scanned shape appears at the front of the Shape row.
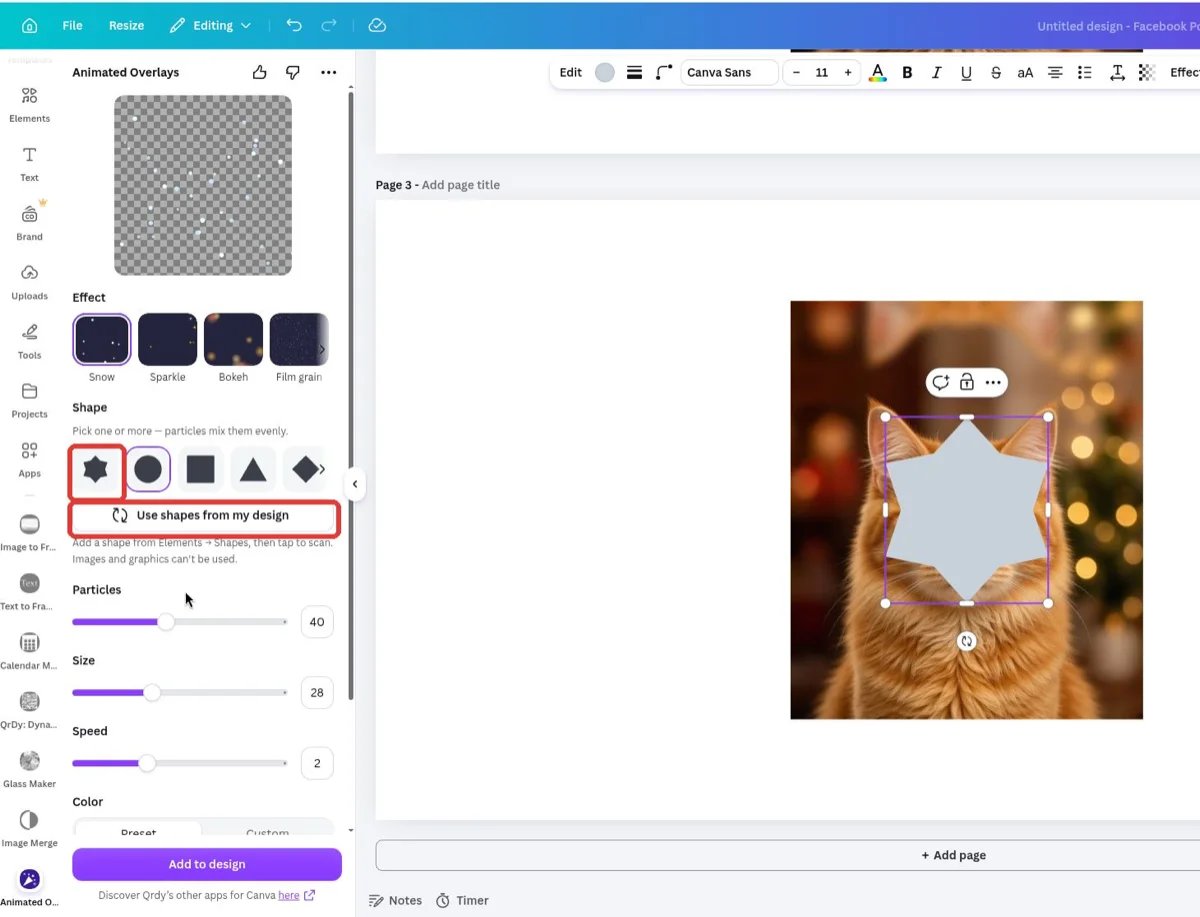
A star shape scanned from the design appears at the start of the Shape row

A star from the design, scanned and placed first in the Shape row

Only vector shapes can be scanned — photos, graphics, text, and stickers are skipped (“Images and graphics can’t be used”).
4

Mix your shape with the built-in ones

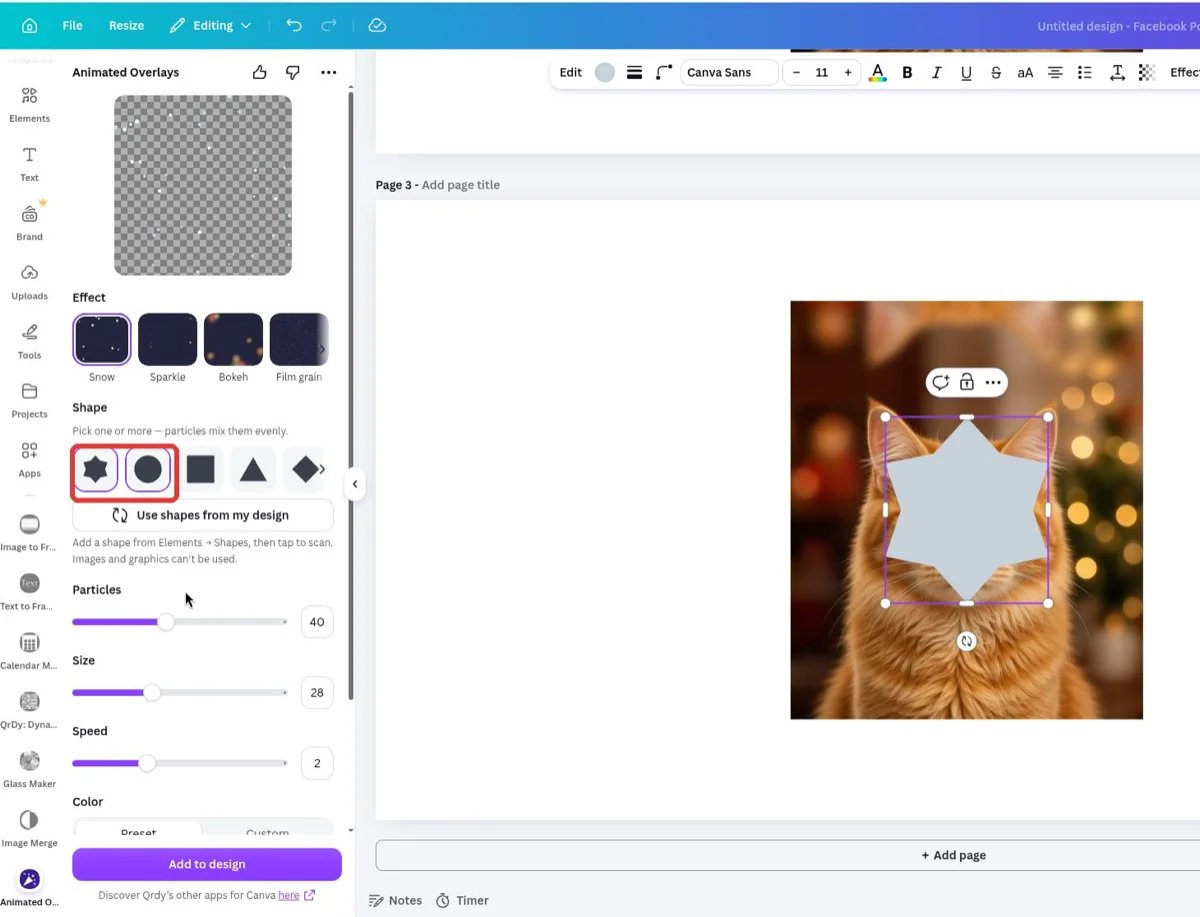
Your scanned shape toggles like any other. Turn it on together with system shapes and the particles blend both — in the preview below, the snowflakes are a mix of the scanned star and the circle.
Star from design and circle shape selected at the same time

Scanned star + circle selected together — particles mix both shapes

Part D — Sliders and colors

1

Drag the three sliders (or type exact values)
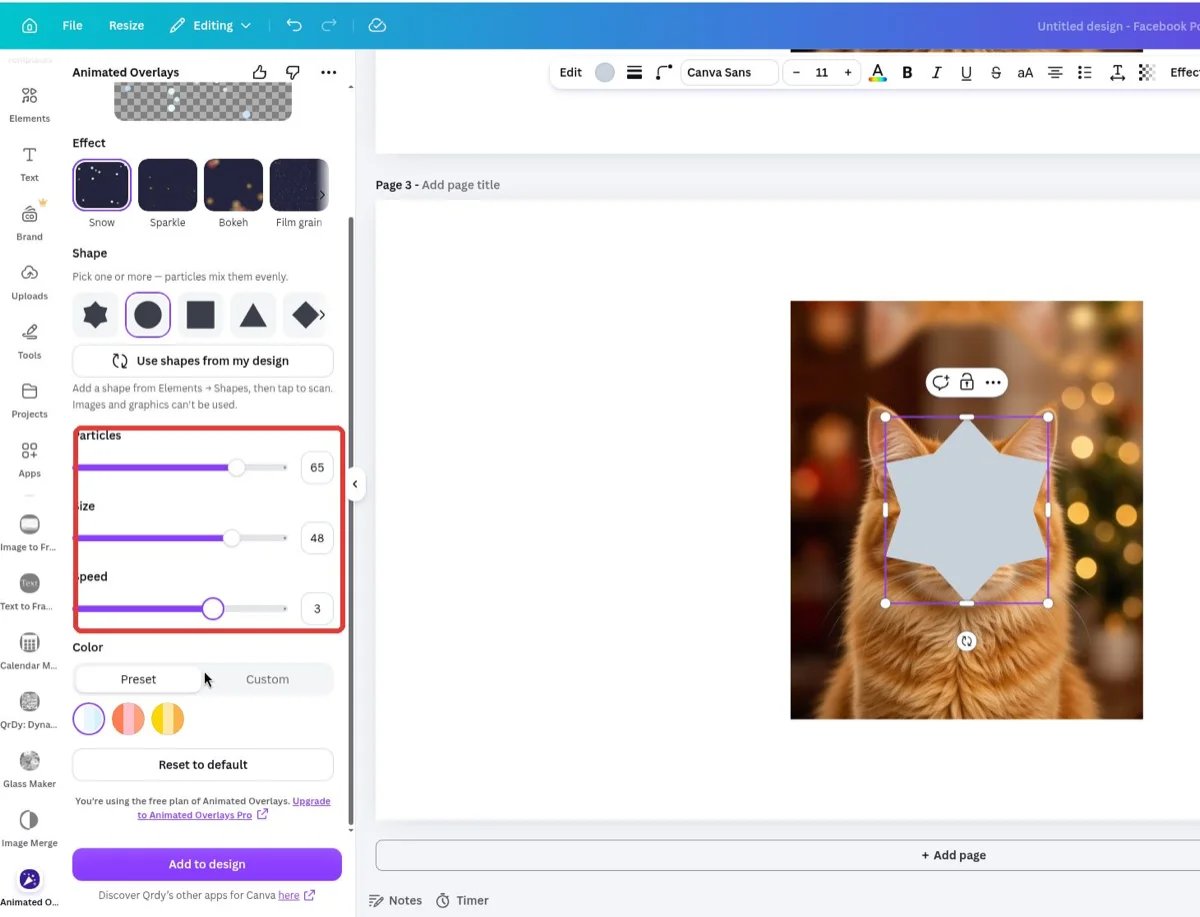
Each slider has a number box you can type into:The preview updates in real time as you drag.
The three sliders set to 65, 48 and 3

Custom values: Particles 65, Size 48, Speed 3

2

Pick a preset color palette

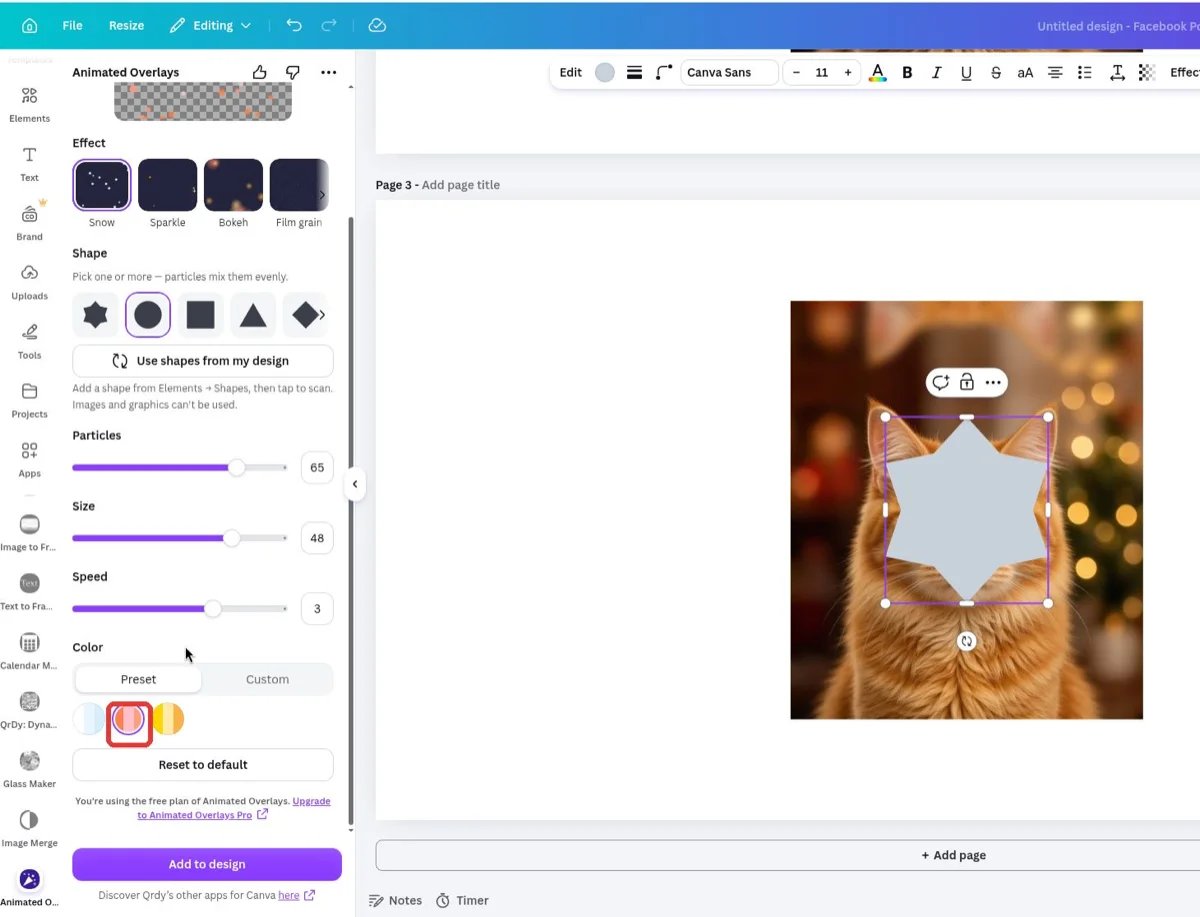
In the Color section, the Preset tab shows curated color swatches for the current effect (Snow has three). Tap a swatch to apply the whole palette.
Preset color swatches for the Snow effect

Preset tab: tapping the orange/pink palette

3

Or set your own colors in the Custom tab
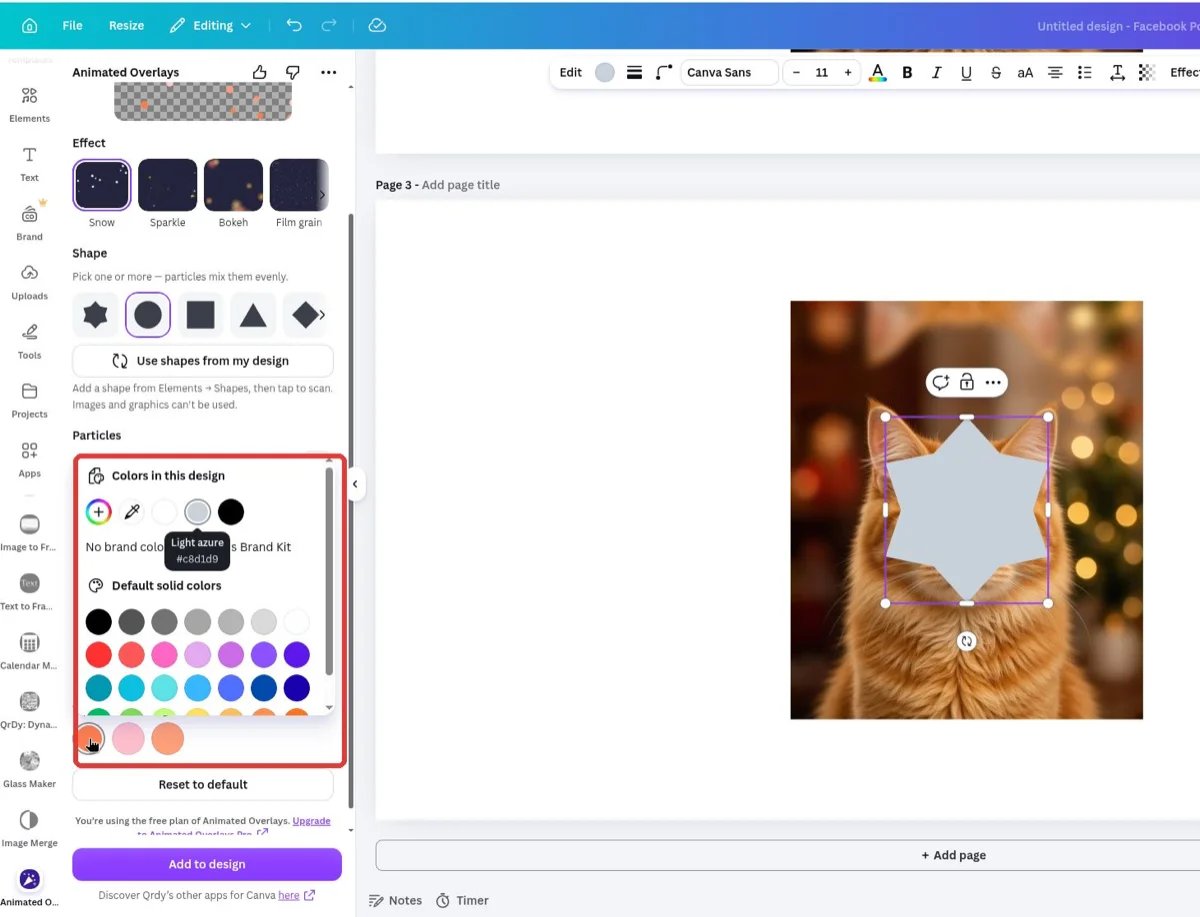
Switch to Custom and you get three color slots (“Tap a color to change it”), pre-filled with the preset you last picked. Tap a slot to open Canva’s color picker — including Colors in this design, your Brand Kit, and the default palette — and choose any color.
Canva color picker opened from the Custom color tab

Canva's color picker opens from the first Custom color slot

4

Reset to default anytime

Reset to default returns the shapes, sliders, and colors to the current effect’s defaults (Snow: 40 / 28 / 2, Preset tab) and generates a fresh random particle layout.

Part E — Add the sticker to your design

1

Press Add to design

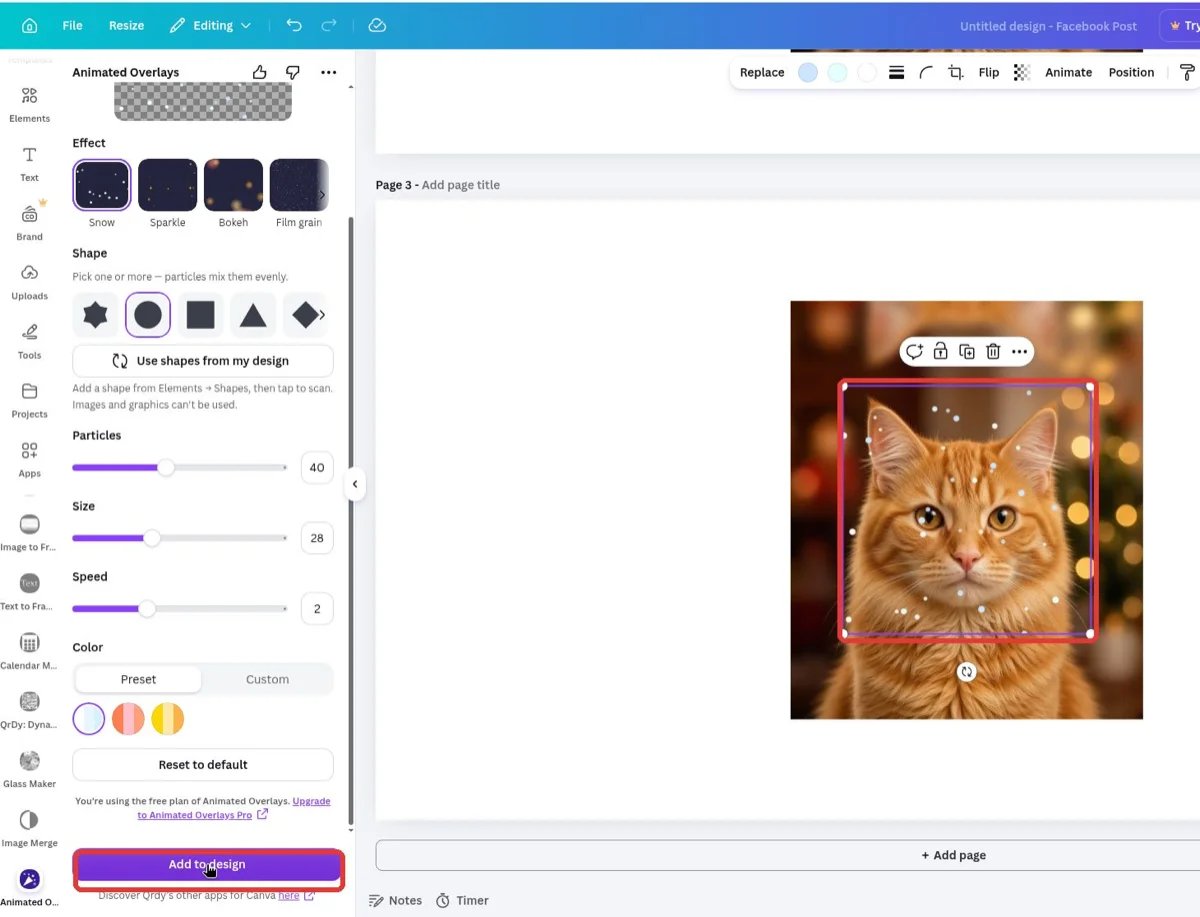
Press the purple Add to design button. After a short spinner, the animated sticker appears on your page, already selected.
Add to design pressed and the animated snow sticker placed over the photo

The snow sticker added on top of the photo, selected on the page

Adding needs an internet connection — the app renders the sticker and hands it to Canva. If adding fails, wait a moment and try again.
2

Move, resize, and layer it like a video element
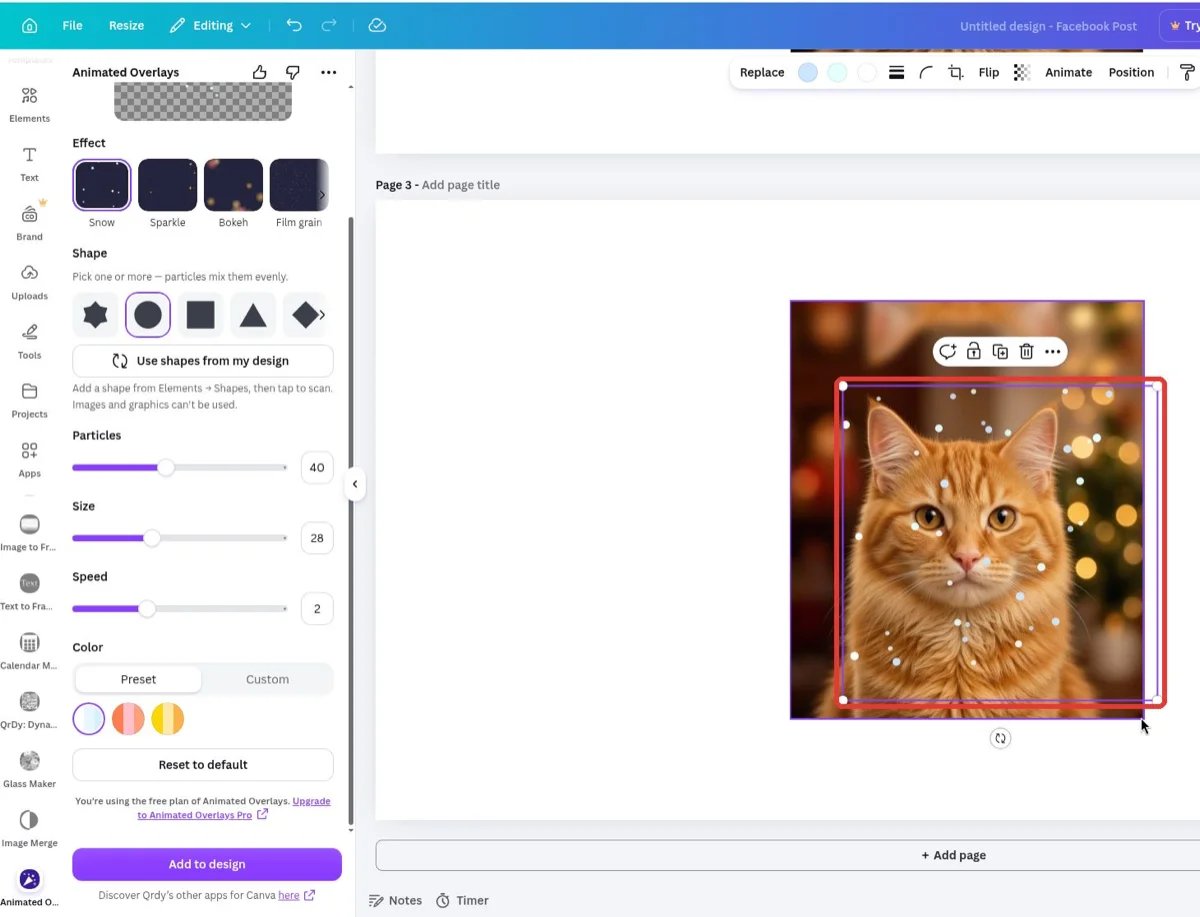
The sticker is a normal animated Canva element: drag to move, pull a corner to scale (it’s vector-based, so it stays sharp at any size), and use Canva’s toolbar to rotate, flip, and change layer order. To cover a whole page, stretch it or add a second sticker.
The animated sticker resized larger over the photo

The sticker stretched wider to cover more of the photo

3

Watch the animation with Canva's Preview
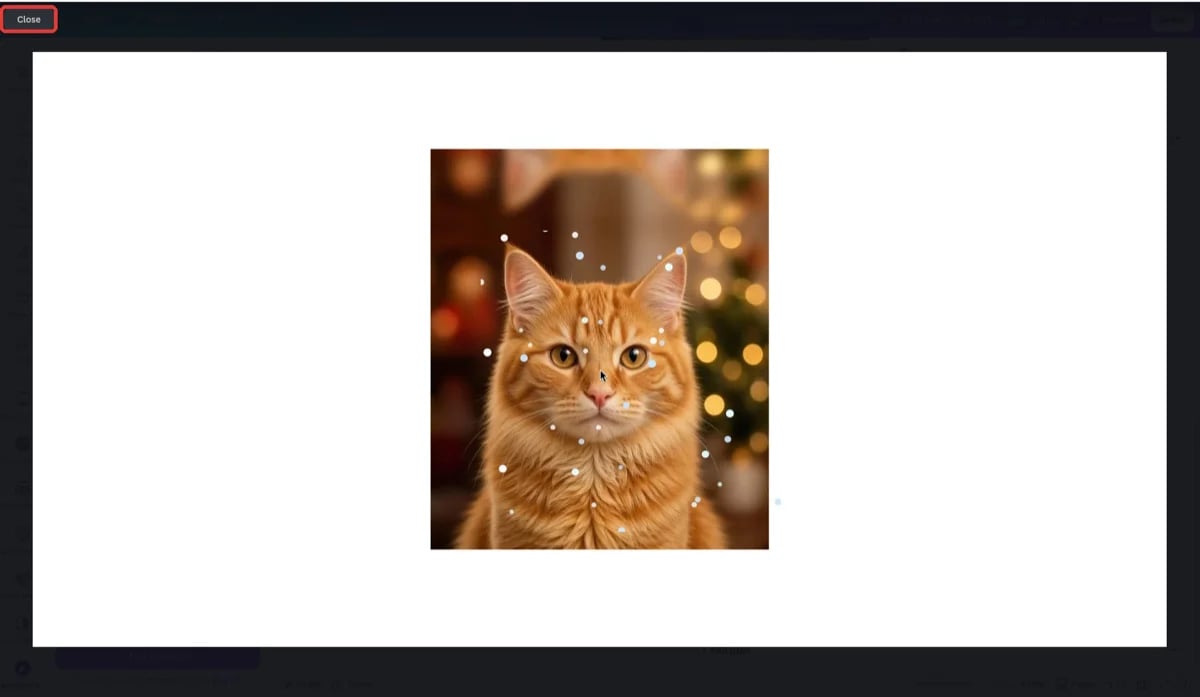
On the canvas the sticker looks static. Press Canva’s Preview (play) button to watch it animate over your design — the background stays fully transparent. Press Close to return to editing.
Canva Preview mode showing animated snow over a cat photo

Preview mode: snow falling over the photo with a fully transparent sticker background

To keep the motion in your final file, download the design as MP4 video — Canva renders the animation. Static exports (PNG, JPG, PDF) capture a single frame.

Part F — Pro effects

1

Try a Pro effect — everything stays adjustable
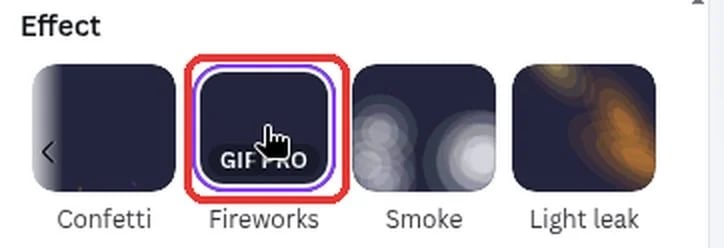
Hover over an effect card to see the GIF PRO badge on Pro effects. On the free plan you can still select a Pro effect (like Fireworks), watch the preview, and adjust every shape, slider, and color.
Fireworks card showing the GIF PRO badge on hover

The GIF PRO badge appears when hovering a Pro effect card
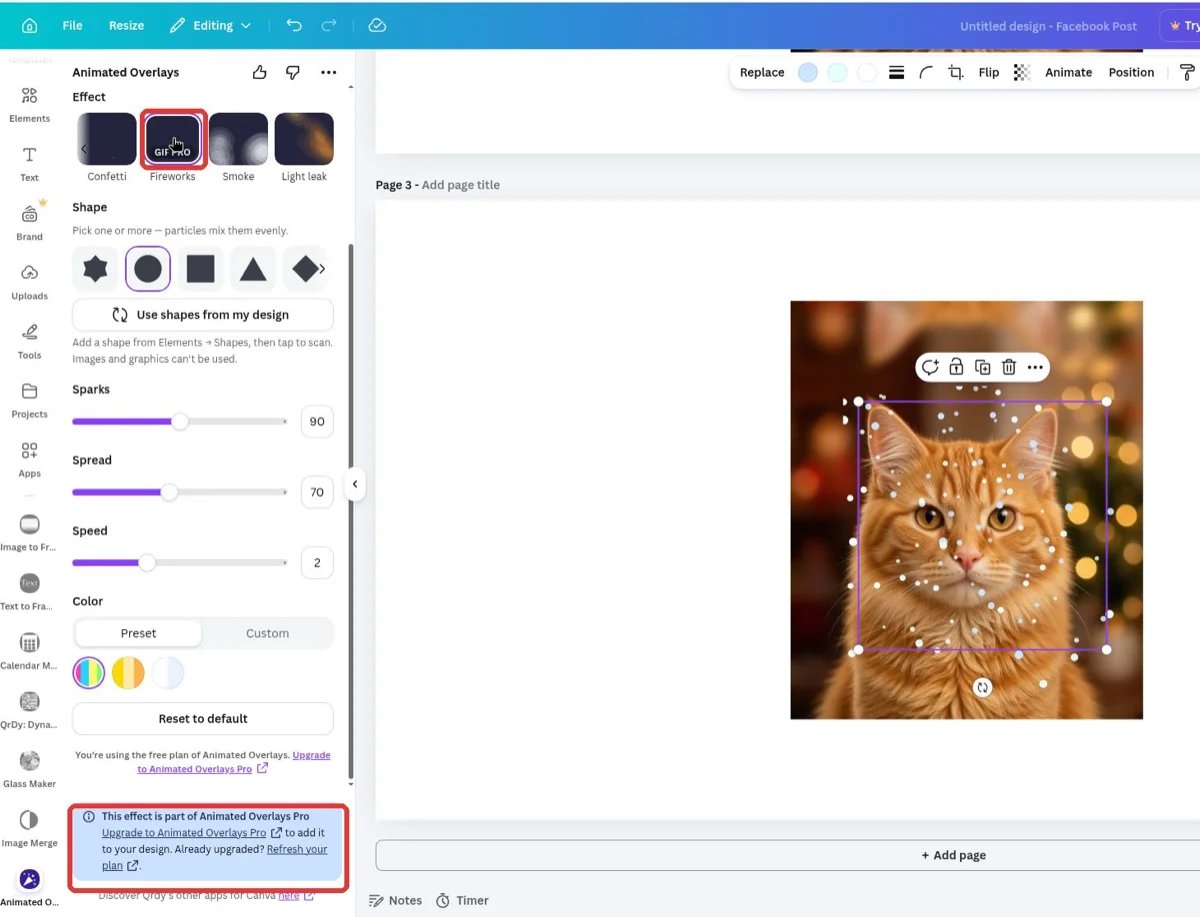
Only the final step changes: Add to design is replaced by a box — “This effect is part of Animated Overlays Pro” — with an Upgrade to Animated Overlays Pro link and a Refresh your plan link to press after you’ve purchased.
Fireworks selected with the Animated Overlays Pro upgrade box shown instead of Add to design

With a Pro effect selected on the free plan, the Add button becomes an upgrade box

Free vs Animated Overlays Pro

Pricing is a single yearly plan — see the Animated Overlays Pro page for the current price. Payment runs through Lemon Squeezy; cancel anytime and keep access until the end of the paid year. It’s independent from Canva Pro.

Tips & notes

  • Each Add creates a new, independent sticker. The app doesn’t edit stickers already on the page — to change one, tweak the settings, add a new sticker, and delete the old one.
  • Stickers are square and loop seamlessly (about 10 seconds per loop). Stretch one or layer two to cover wide pages.
  • Heavy settings can hit the size limit. Very complex shapes at maximum count can exceed the 0.5MB sticker budget — the app warns you and locks the Add button until you reduce the amount or size.
  • Soft effects are layered shapes. Bokeh, Smoke, and Light leak approximate blur with concentric shape layers, so they can show banding when examined up close.
  • Match the effect to the job: snow, confetti, and bokeh for Reels and Stories; sparkle and light leak for opening slides; confetti, fireworks, balloons, hearts, and blossom for event banners; film grain and embers for cinematic thumbnails.
  • On-brand motion: scan your logo mark as the particle shape and set brand colors in the Custom tab.
Works well with other Qrdy apps: Glass Maker for glass panes and glass text, Image Merge for blended imagery, and Frames Lab for custom frames.

Frequently asked questions

The editing canvas shows a static frame. Press Canva’s Preview (play) button, or export as MP4 video, to see the animation.
No. Free inserts are unlimited and watermark-free — the free plan simply includes 7 of the 16 effects.
You can move, resize, rotate, and layer it, but its effect settings are baked in. For different settings, add a new sticker and delete the old one.
Only vector shapes from Elements → Shapes can be scanned. Photos, graphics, text, and stickers are skipped, and extremely complex shapes may be rejected.
No. Animated Overlays works on any Canva account. Animated Overlays Pro is a separate upgrade that unlocks the 9 extra effects inside this app.