> ## Documentation Index
> Fetch the complete documentation index at: https://docs.qrdyai.com/llms.txt
> Use this file to discover all available pages before exploring further.
# Text to Frames: The Complete Guide (Every Feature, Step by Step)
> The full Text to Frames guide for Canva — turn each letter into its own frame, fill text with different photos, and add blur, border, and inner shadow. 100+ fonts, with screenshots.
**Text to Frames** turns a word into **Canva frames — one frame per letter** — so you can drop a different photo or video into each letter. It's the fast way to make photo-filled typography in Canva, with real, editable letter frames. This guide covers **every feature**, step by step, with screenshots.
## What makes it different
* **Canva's default / Clipping Mask:** one image shows through all the letters at once.
* **Text to Frames:** **each letter is its own frame**, so you can fill every letter with a different image and arrange them freely.
 ## Step-by-step
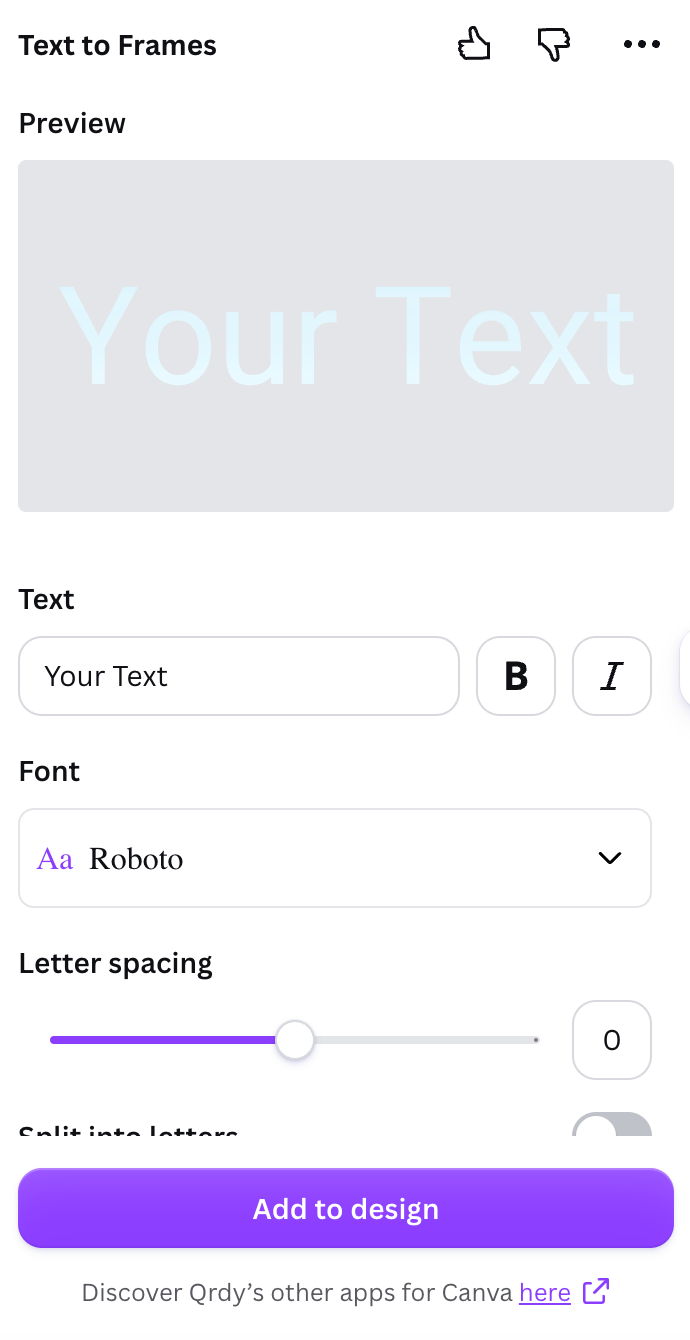
Launch Text to Frames from the Canva **Apps** panel.
Enter your word (up to 200 characters). Use **B** (bold) and **I** (italic) — if they're greyed out, the chosen font doesn't include that style.
Pick from 100+ fonts. Fonts marked **Pro** are part of the paid plan.
Set **Letter spacing** (−100 to 100) and **Font size**. Turn on **Split into letters** so each character becomes its own frame for different images.
Turn on **Blur**, **Border**, or **Inner shadow** and pick a color for each (see below).
The **Preview** updates about half a second after each change — what you see is exactly what gets added. If the text is too long, the app says so; shorten it or reduce the size.
Click **Add to design**, then drag a photo into the letters. With **Split into letters** on, drop a different image into each one, then drag/zoom inside each letter.
Some Canva design types don't allow frames. If you see "Frames can't be added to this design type," open the app in another design (Presentation, Poster, Instagram Post, etc.).
## Fonts: 100+ options
The app includes 100+ curated Google Fonts — modern sans (Roboto, Poppins, Montserrat), elegant serif (Playfair Display), handwriting (Pacifico), plus specialty fonts like pixel (Press Start 2P), horror (Creepster), and sci-fi (Orbitron, Audiowide). The free plan opens **5 fonts** (Roboto, Open Sans, Lato, Playfair Display, Pacifico); Pro unlocks all the rest.
## The three Pro effects
## Step-by-step
Launch Text to Frames from the Canva **Apps** panel.
Enter your word (up to 200 characters). Use **B** (bold) and **I** (italic) — if they're greyed out, the chosen font doesn't include that style.
Pick from 100+ fonts. Fonts marked **Pro** are part of the paid plan.
Set **Letter spacing** (−100 to 100) and **Font size**. Turn on **Split into letters** so each character becomes its own frame for different images.
Turn on **Blur**, **Border**, or **Inner shadow** and pick a color for each (see below).
The **Preview** updates about half a second after each change — what you see is exactly what gets added. If the text is too long, the app says so; shorten it or reduce the size.
Click **Add to design**, then drag a photo into the letters. With **Split into letters** on, drop a different image into each one, then drag/zoom inside each letter.
Some Canva design types don't allow frames. If you see "Frames can't be added to this design type," open the app in another design (Presentation, Poster, Instagram Post, etc.).
## Fonts: 100+ options
The app includes 100+ curated Google Fonts — modern sans (Roboto, Poppins, Montserrat), elegant serif (Playfair Display), handwriting (Pacifico), plus specialty fonts like pixel (Press Start 2P), horror (Creepster), and sci-fi (Orbitron, Audiowide). The free plan opens **5 fonts** (Roboto, Open Sans, Lato, Playfair Display, Pacifico); Pro unlocks all the rest.
## The three Pro effects
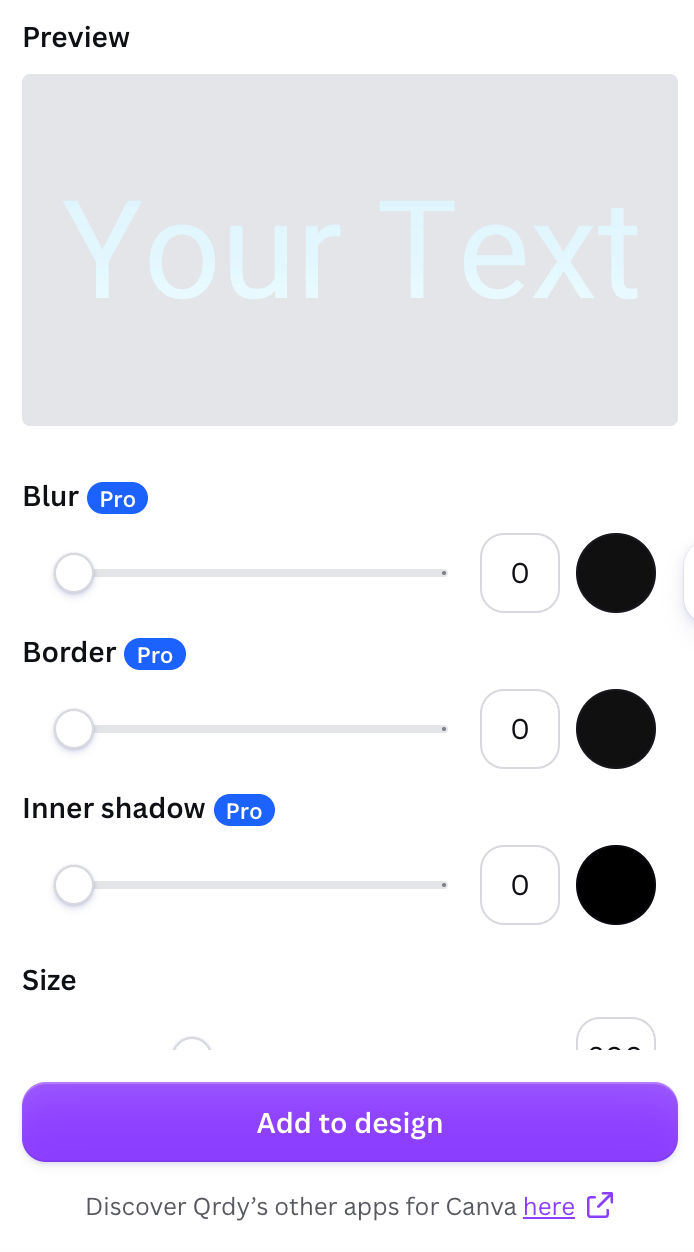 A soft glow behind the letters (0–20). Great for a neon or glowing look, or to soften the edges.
An outline that hugs each letter (0–50). Helps the text stand out when the image inside is busy.
A shadow inside the letters (0–40) for depth — as if the text is carved or raised.
Each effect has a color and a strength slider, and they stack: Blur and Border sit behind the letters, Inner shadow sits in front. When a free user turns on any Pro effect (or a Pro font), the main button changes to **Try Text to Frames Pro**. After upgrading in the browser, click **Restart Text to Frames** to apply Pro without reopening the app.
## Use cases
* **Event banners** — each letter a highlight photo.
* **Movie/album titles** — each letter reveals a different scene.
* **Social covers** — a big word with video running inside each letter (Canva frames accept video too).
* **Logos / branding** — a brand name with a different background per letter.
## Frequently asked questions
Type your word in Text to Frames, add it to your design, then drag a photo into the letters. Turn on **Split into letters** to fill each letter separately.
The letters are real Canva frames, so you can swap and reposition images anytime. (Re-typing the word means generating it again in the app.)
Thick, bold, or rounded fonts leave more room for the image to show through.
Turn any word into photo-fillable Canva letter frames.
A soft glow behind the letters (0–20). Great for a neon or glowing look, or to soften the edges.
An outline that hugs each letter (0–50). Helps the text stand out when the image inside is busy.
A shadow inside the letters (0–40) for depth — as if the text is carved or raised.
Each effect has a color and a strength slider, and they stack: Blur and Border sit behind the letters, Inner shadow sits in front. When a free user turns on any Pro effect (or a Pro font), the main button changes to **Try Text to Frames Pro**. After upgrading in the browser, click **Restart Text to Frames** to apply Pro without reopening the app.
## Use cases
* **Event banners** — each letter a highlight photo.
* **Movie/album titles** — each letter reveals a different scene.
* **Social covers** — a big word with video running inside each letter (Canva frames accept video too).
* **Logos / branding** — a brand name with a different background per letter.
## Frequently asked questions
Type your word in Text to Frames, add it to your design, then drag a photo into the letters. Turn on **Split into letters** to fill each letter separately.
The letters are real Canva frames, so you can swap and reposition images anytime. (Re-typing the word means generating it again in the app.)
Thick, bold, or rounded fonts leave more room for the image to show through.
Turn any word into photo-fillable Canva letter frames.