> ## Documentation Index
> Fetch the complete documentation index at: https://docs.qrdyai.com/llms.txt
> Use this file to discover all available pages before exploring further.
# How to Make Custom Frames in Canva with Frames Lab
> Create custom frames in Canva — grids, arcs, bursts, diagonal layouts, and frames from your own shapes — with the Frames Lab app, then drop in any photo or video.
Canva's built-in frames are limited to basic shapes. **Frames Lab** is a Canva app that lets you build frames exactly the way you want — grids, arcs, sunbursts, diagonal layouts, or a frame traced from your own shape — then drop any photo or video inside. Every frame auto-fits the design you're working in, so you never resize by hand.
 ## What Frames Lab does
Frames Lab works in three tabs:
Build a new frame from five modes: Shape, Burst, Grid, Arc, and Diagonal.
Pick a ready-made frame from themed collections — no setup needed.
Re-add a frame you just used with blur, border, or inner shadow effects.
## How to make a custom frame (Create tab)
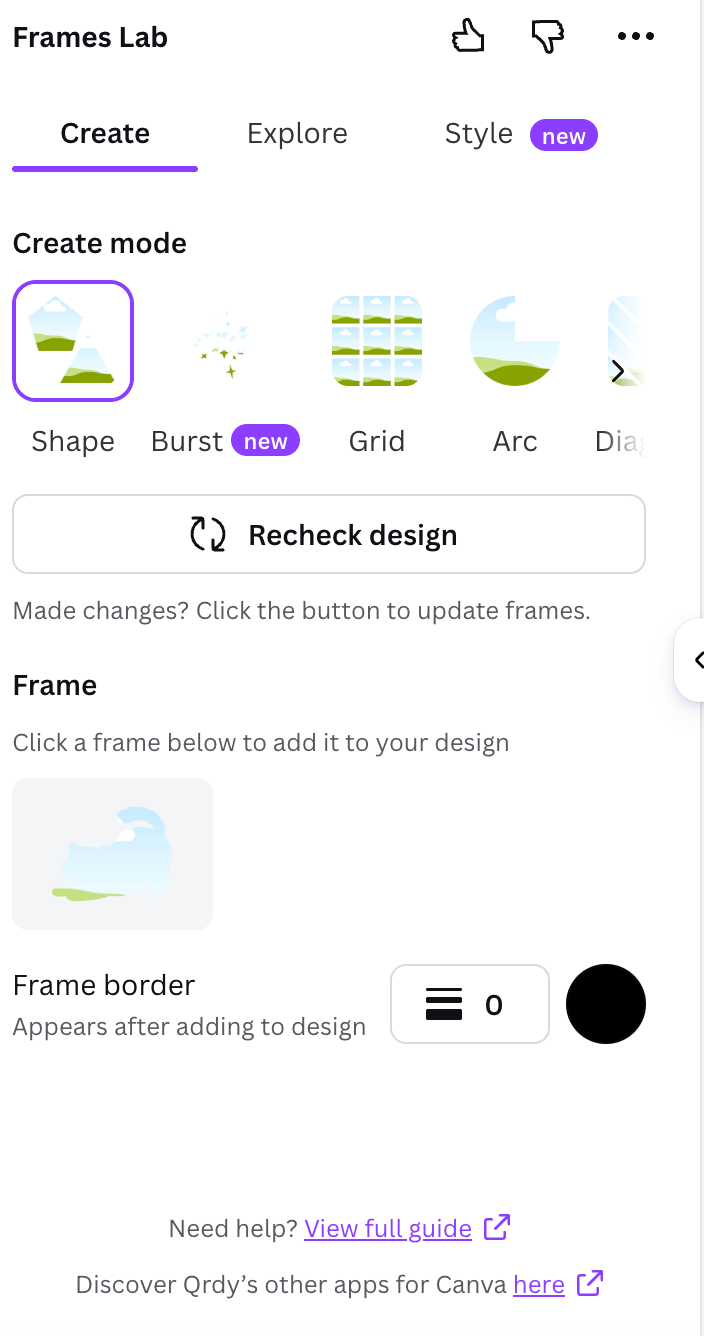
Open **Apps** in Canva, search for **Frames Lab**, and open it. In the **Create** tab, pick a mode from the **Create mode** strip.
### Turn a shape into a frame
From **Elements → Shapes** or **Graphics**, add any shape to your Canva page.
In Frames Lab, click **Recheck design** so the app detects your shape.
Click the detected frame to drop it into your design. Set a **border** color and weight first if you want one.
Whenever you change a shape in your design, click **Recheck design** again so Frames Lab updates.
### Make a grid (collage) frame
## What Frames Lab does
Frames Lab works in three tabs:
Build a new frame from five modes: Shape, Burst, Grid, Arc, and Diagonal.
Pick a ready-made frame from themed collections — no setup needed.
Re-add a frame you just used with blur, border, or inner shadow effects.
## How to make a custom frame (Create tab)
Open **Apps** in Canva, search for **Frames Lab**, and open it. In the **Create** tab, pick a mode from the **Create mode** strip.
### Turn a shape into a frame
From **Elements → Shapes** or **Graphics**, add any shape to your Canva page.
In Frames Lab, click **Recheck design** so the app detects your shape.
Click the detected frame to drop it into your design. Set a **border** color and weight first if you want one.
Whenever you change a shape in your design, click **Recheck design** again so Frames Lab updates.
### Make a grid (collage) frame
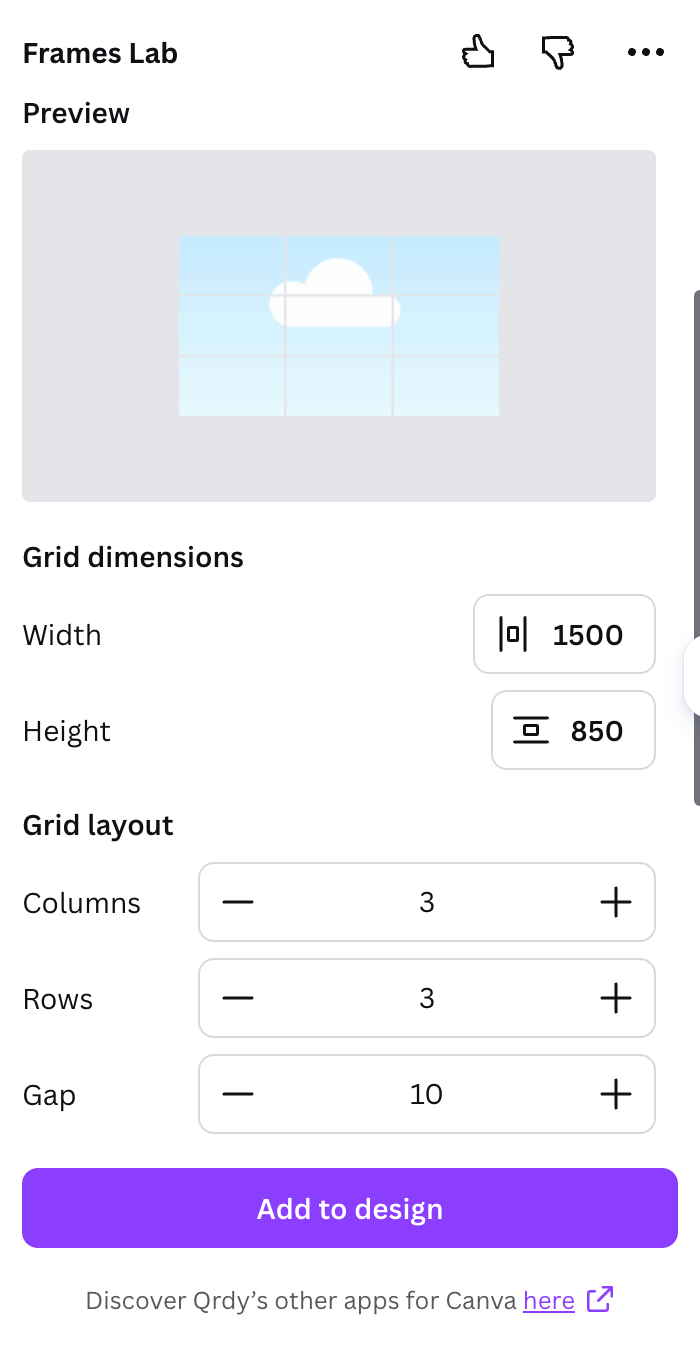 Select **Grid** in the Create mode strip.
Adjust width and height, then set **columns, rows, and gap**. The preview updates live.
Open the **Wave effect** to make the grid lines curve, or use **Advanced options** for combined cells and corner rounding.
Click **Add to design**, then drag a photo into each cell.
### Other Create modes
Random sunburst/spark frames. Tune Style, Density, Size, Spread, and Distribution — results are random, so grab one you like.
A curved/arc frame. Set the **sweep angle** and start angle.
Like Grid, but the strips run on an angle you control.
Turn any shape already in your design into a frame.
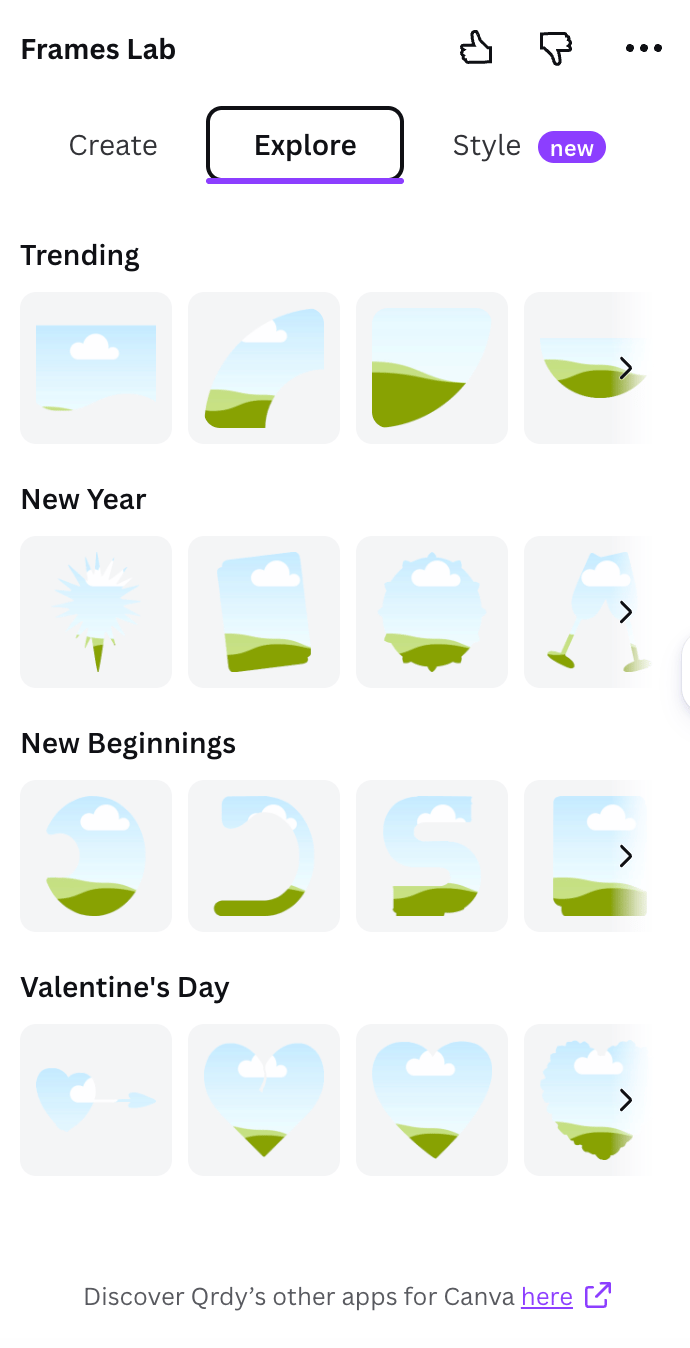
## Use a ready-made frame (Explore tab)
If you don't want to configure anything, open **Explore** and click a frame from the themed collections (Trending, seasonal sets, and more). It drops straight into your design.
Select **Grid** in the Create mode strip.
Adjust width and height, then set **columns, rows, and gap**. The preview updates live.
Open the **Wave effect** to make the grid lines curve, or use **Advanced options** for combined cells and corner rounding.
Click **Add to design**, then drag a photo into each cell.
### Other Create modes
Random sunburst/spark frames. Tune Style, Density, Size, Spread, and Distribution — results are random, so grab one you like.
A curved/arc frame. Set the **sweep angle** and start angle.
Like Grid, but the strips run on an angle you control.
Turn any shape already in your design into a frame.
## Use a ready-made frame (Explore tab)
If you don't want to configure anything, open **Explore** and click a frame from the themed collections (Trending, seasonal sets, and more). It drops straight into your design.
 ## Add effects (Style tab)
Every frame you add is saved under **Last frames** in the **Style** tab. Re-add it with effects:
## Add effects (Style tab)
Every frame you add is saved under **Last frames** in the **Style** tab. Re-add it with effects:
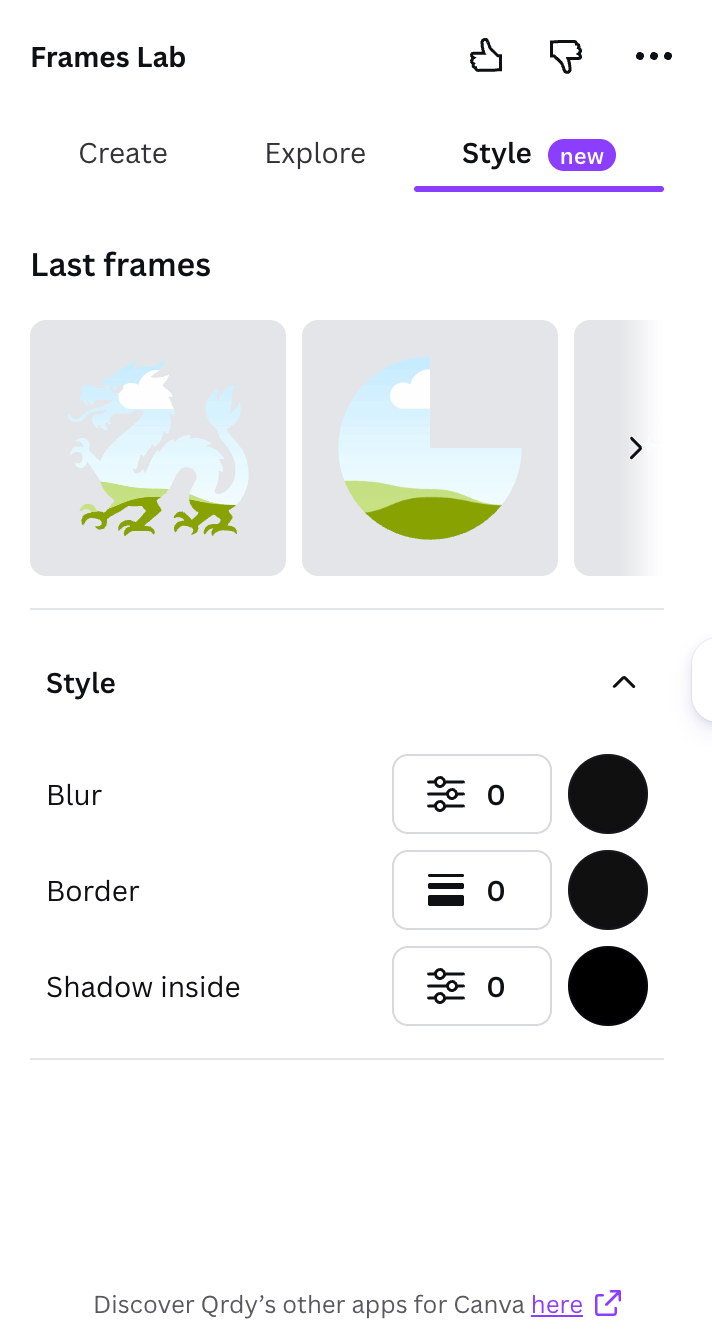 * **Blur** — a soft glow behind the frame.
* **Border** — an outline that hugs the frame edge.
* **Inner shadow** — depth inside the frame.
Pick a color and strength for each, then click the frame to re-add it with the effects applied.
## Drop in your photo
After any frame is in your design, drag a photo or video onto it. The image snaps to the frame's shape and crops automatically — double-click to reposition it inside.
## Frequently asked questions
Frames Lab has a free tier with a limit on how many frames you can add. Pro removes the limit.
Make sure the shape was added from **Elements → Shapes/Graphics**, then click **Recheck design** so the app picks it up.
Very complex grids (too many cells or a strong wave) get blocked. Reduce the rows/columns or the wave strength and try again.
* **Blur** — a soft glow behind the frame.
* **Border** — an outline that hugs the frame edge.
* **Inner shadow** — depth inside the frame.
Pick a color and strength for each, then click the frame to re-add it with the effects applied.
## Drop in your photo
After any frame is in your design, drag a photo or video onto it. The image snaps to the frame's shape and crops automatically — double-click to reposition it inside.
## Frequently asked questions
Frames Lab has a free tier with a limit on how many frames you can add. Pro removes the limit.
Make sure the shape was added from **Elements → Shapes/Graphics**, then click **Recheck design** so the app picks it up.
Very complex grids (too many cells or a strong wave) get blocked. Reduce the rows/columns or the wave strength and try again.